How to Install a Handheld Shower Head
As an Amazon Associate we earn from qualifying purchases.
The short answer on how to install handheld shower head hardware: unscrew the old fixed head, hand tighten a bracket to the shower arm, hand tighten the hose and its washers to the bracket and the handheld unit, then turn the water on and check every joint for leaks. The order and the thread tape question depend on your model, because the two Moen sheets we opened give different steps.
Quick answer
- Check your model number first. Moen’s two sheets cover different products.
- Remove the old head by hand. Use a wrench only if it will not turn, and take care not to loosen the shower arm.
- Hand tighten the bracket, then the hose and washers. Moen says “Do not overtighten.”
- Use thread tape only where your manual allows it. Moen’s handheld sheet says “Thread seal tape is not recommended for this project,” while DOE’s job aid says “Use thread tape at all connections.”
- Turn the water on and check for leaks. Diverter repairs and anything that reaches the valve or the pipe belong with a licensed plumber.
Before you start
Moen’s handheld installation sheet (INS10819) lists three steps and says the existing shower arm is not included in the kit. The arm already on your wall has to suit the bracket. None of the sources we opened gives a shower arm thread size, so check the arm or the manual before you buy.
Gather the tools the sources name: an adjustable wrench for the old head, a pipe wrench or channel locks if the arm connection will not loosen by hand (DOE’s job aid), and a cloth, pliers and thread sealant tape (New Jersey Department of Health guide). DOE also suggests wrapping an old head that has no flat sides with buffer material, such as a piece of rubber.
Turn the supply off before you disconnect anything. The New Jersey guide says to turn the water off while you prepare the arm threads. None of the sources explains how to shut off a shower supply, so find your home’s shutoff before you start. Moen’s magnetic docking sheet (INS10567A) gives a shutoff step for faucet work only: open the faucet to relieve pressure and make sure the water is fully off.
Moen’s handheld sheet says to “Install this product with a backflow preventer as required by the local plumbing code.” None of the sources names the device your home needs. If your code calls for one, a licensed plumber should confirm it.
How to install handheld shower head: the step-by-step method
1. Remove the old fixed head
Start by hand. The New Jersey guide says to try unscrewing the head by hand first, gripping the head or its connecting nut depending on the design, and turning counterclockwise. If it will not turn, wrap the arm with a rag, hold it with pliers, and use an adjustable wrench on the head. Moen’s sheet gives the same first step: “Remove existing showerhead. Use wrench if necessary.” DOE says to take care not to loosen the shower arm while you do this.
2. Clean the arm threads
With the head off, remove any old tape from the arm. The New Jersey guide says to clean off rust or mineral deposits with a cloth or toothbrush, flush the plumbing with the head off, and dry the threads completely. DOE’s job aid says to clean the threads well to remove old residue.
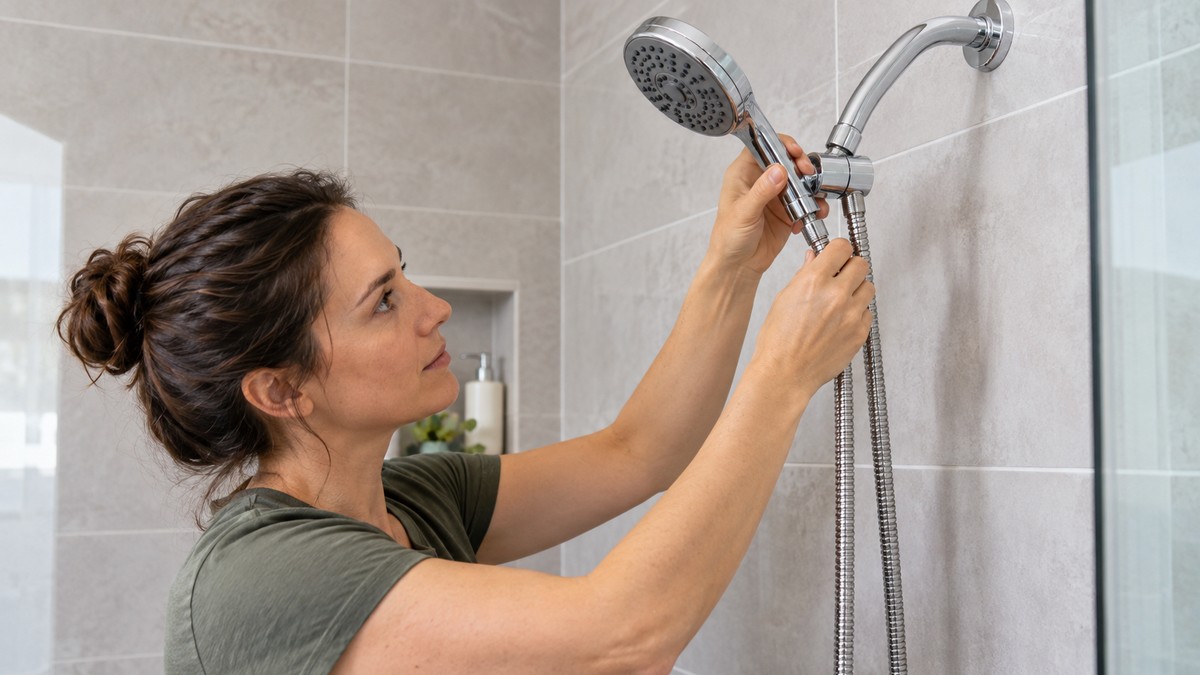
3. Attach the bracket to the arm
This is where the two Moen sheets differ. The handheld sheet says to “Hand tighten handheld bracket to shower arm.” The magnetic docking sheet says to add thread seal tape to the arm threads, attach the bracket, and then tighten with a wrench. Those are different products, so do not mix the two sequences. Follow the sheet that matches your model.
DOE’s job aid asks for connections that will not leak while buffer material prevents damage to the fixture. Tighten carefully, and check for leaks in step 5 rather than tightening further.
4. Connect the hose and the handheld unit
Hand tighten the hose and its washers to the bracket and the handheld shower. Moen states the step as “Hand tighten hose and washers to bracket and handheld shower.” The sources do not describe replacing a washer. If one is damaged, check the manual or contact the manufacturer before you buy parts.
5. Turn on the water and check every joint
Turn the water on and check the arm, bracket, hose and handheld unit for leaks. If the arm connection leaks, the New Jersey guide says to re-wrap the threads with thread sealant tape and tighten again carefully with an adjustable wrench. DOE’s checklist expects “There is no water leakage upon completion.” Do not call the install finished until every joint is dry.
How to install handheld shower head with a slide bar
A slide bar holds a handheld on a vertical rail so you can raise or lower it. The sources we opened do not cover slide bars, so this guide cannot give wall-mounting steps for one. Moen’s sheets describe a bracket that attaches to the shower arm, not a bar. Follow the bar maker’s manual for the wall fixing, then use the bracket and hose steps above only where the parts match.
Check the bar’s load rating against the handheld you plan to hang, because none of the sources states a load for any bar. Do not overtighten any clamp. For options, see slide bar options and handheld shower heads on a slide bar.
How to install handheld shower head holder
In Moen’s handheld sheet, the bracket is the holder: it attaches to the arm and holds the handheld shower. The magnetic docking sheet also uses an arm bracket, with a handheld that docks onto it. That handheld “contains neodymium magnets,” and the sheet warns that in some conditions the magnets may interfere with pacemakers or other implantable medical devices. If you wear one of those devices, the sheet tells you to consult your device manufacturer and your physician or clinician for specific guidance.
A holder that mounts with suction or a wall cradle is a different product. The sources we opened do not cover those, so do not follow the bracket steps for them. For a holder that works with a slide bar, see adjustable holders for a slide bar.
How to change a shower head to a handheld
Changing a fixed head to a handheld means removing the fixed head, adding a bracket to the arm, and attaching a hose and handheld unit. The DOE job aid frames the choice as a matter of need: install the new showerhead “according to occupant needs, such as handheld, shut-off, or swivel.” Decide on the setup before you buy the parts. Three points are specific to the change:
- Check the flow marking. EPA’s WaterSense page says labeled showerheads “must demonstrate that they use no more than 2.0 gpm.” Look for the marking on the head or its packaging.
- EPA’s page suggests checking the washer or o-ring inside the showerhead while you make a repair. If you are only swapping the head, the manual is the better guide.
- Pressure is a supply question. EPA says system pressure should be between 20 and 80 pounds per square inch (psi) for optimum showerhead efficiency. None of the sources says a handheld adds supply pressure.
How to use shower diverter
A shower diverter is the control that sends water to the tub spout or to a second outlet, usually the showerhead. EPA’s WaterSense at Work guide describes diverters as sending water “toward the tub spout” or to the showerhead.
The sources we opened do not describe how a particular diverter is operated. Check the control on your fixture and the manual. Set it to the shower and run the water. The water should come from the head or the handheld, not from the tub spout. If water keeps coming from the tub spout while the shower runs, EPA says many diverters “continuously leak a small amount of water from the tub spout while they are engaged.” That is the sign to check the diverter.
How to fix shower diverter
EPA’s guidance gives a practical check. With the shower on and the diverter engaged, look for water from the tub spout. EPA treats a leak greater than 0.2 gpm as a large one. For a large leak, EPA says to remove the diverter and clean it with cleaning products or white vinegar to remove scale. If cleaning does not minimize the leak, “replace it with a new diverter.”
Moen’s article on a tub spout that leaks when water is diverted to the showerhead says to “Replace the diverter cartridge.” That advice is for a Moen standard valve, and your fixture may differ.
This guide stops at the diagnosis. Removing a diverter from the tub spout, or replacing a diverter cartridge, means working on the tub spout and the valve behind the wall. That goes beyond swapping a head, arm, hose or filter. The sources we opened do not give safe steps for it, so call a licensed plumber.
How to replace shower hose
A hose replacement uses the same connections as the full install. Turn the water off before you disconnect the hose, as the New Jersey guide does before it prepares the arm threads. Then separate the hose at the bracket and at the handheld end.
The handheld end needs care. A care-equipment installation guide for hand showers from Australia says: “Do not unscrew the head as this will prevent a proper seal.” If your hand shower is built similarly, leave the head on its end and separate the hose at the bracket instead. Check your manual first.
Thread tape is still disputed. Moen’s handheld sheet discourages it, DOE’s job aid calls for it at all connections, and the New Jersey guide wraps tape clockwise on the arm threads. Use the tape guidance from the step-by-step section above, then hand tighten the new hose and check for leaks with the water on.
The Australian guide also says that if the equipment should “appear damaged,” it must not be used, and that it “may require replacing.” It does not describe what damage to look for, so use your judgment and the manual.
How to choose a replacement shower hose
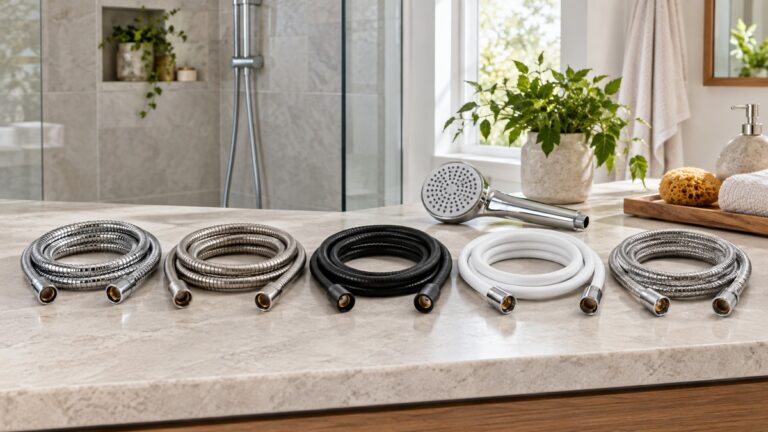
Start with the model. Both Moen sheets cover specific products, and the magnetic docking sheet says its image is “for reference only.” A replacement hose has to suit the bracket on your arm and the handheld unit, so match the model number before you order.
The sources do not give hose lengths or a material standard for US handhelds. The Australian guide says “Shower hose is available in 1.5 and 2 metre lengths with plastic hose,” and it notes that “Some have stainless steel outer casing.” That guide covers a different product class and market, so treat those figures as examples only. It also says “The plastic will perish faster if the water temperature is above 50 degrees,” without stating a unit, so do not read it as a rated limit. For more reach, see extension hoses for handheld shower heads, or see replacement hoses for Waterpik shower heads for a brand-specific option.
Think about features as well as length. DOE’s job aid says to choose the fixture for occupant needs, such as handheld, shut-off or swivel. The sources do not say which hoses offer those features.
How we chose
This guide relies on eight sources, each opened on 2026-10-22, with every quoted sentence checked against the page text. We chose manufacturer instruction sheets, a DOE installer job aid, a New Jersey health department guide, two EPA WaterSense pages, a Moen diverter article and an Australian care-equipment guide. The Moen sheets carry the most weight for handheld steps. This guide ranks no products and names none for sale.
What we could not verify: what the sources do not say
- Shower arm thread size. No source we opened states it.
- How to shut off a shower supply. The sources say to turn the water off but do not explain how.
- Slide bar wall fixing and load ratings.
- Suction and cradle holders.
- Diverter operation by control type, and steps to remove a tub spout diverter or replace a diverter cartridge.
- Which backflow device your home needs. The sources defer to local code.
- Hose length, material and fitting type for US handhelds.
- Whether a handheld changes supply pressure. None of the sources says it does.
- Washer and gasket replacement steps. Moen’s sheets name washers but do not describe replacing them.
Frequently asked questions
Do I need thread tape for a handheld shower?
It depends on the sheet for your model. Moen’s handheld sheet says thread seal tape “is not recommended for this project.” Moen’s magnetic docking sheet says to add tape to the shower arm threads. DOE’s job aid says to use thread tape at all connections. If your sheet says nothing, the sources do not settle the question.
Will any handheld shower fit my existing arm?
The sources do not say which handheld fits which arm. Moen’s handheld sheet notes that the existing shower arm is not included, so the arm on your wall must suit the bracket. Check the arm and the bracket before you buy.
Do I always need a wrench to remove the old head?
No. The New Jersey guide says to try unscrewing the head by hand first. Moen’s sheet says to use a wrench “if necessary.”
What if the connection leaks after installation?
For a shower head connection, the New Jersey guide says to re-wrap the threads with thread sealant tape and tighten carefully with an adjustable wrench. The sources do not describe a fix for a leaking bracket, hose or washer joint, so check the manual or contact the manufacturer.
Can I do this install myself, or should a plumber do it?
The sources cover swapping a head, bracket, hose or handheld unit, which is the work this guide describes. Anything that reaches the valve, the tub spout or the pipe is beyond that scope, and a licensed plumber should do it.
Bottom line
Match the model number, unscrew the old head by hand, hand tighten the bracket, hose and washers, and use thread tape only where your manual allows it. Check every joint with the water on. Leave diverter work, and anything that reaches the valve or the pipe, to a licensed plumber.
Sources
- Moen, Handheld Shower Installation Guide INS10819: https://assets.moen.com/shared/docs/instruction-sheets/ins10819.pdf (opened 2026-10-22)
- Moen, Magnetic Docking Handheld Shower Instruction Sheet INS10567A: https://assets.moen.com/shared/docs/instruction-sheets/ins10567a.pdf (opened 2026-10-22)
- U.S. Department of Energy, Install a Low-Flow Showerhead, Weatherization Installer Job Aid 24-1 (June 2024): https://www.energy.gov/sites/default/files/2024-07/24-1_install-low-flow-showerhead.pdf (opened 2026-10-22)
- New Jersey Department of Health, Guidance for Removing and Cleaning a Shower Head: https://nj.gov/health/cd/documents/topics/legion/ShowerHead_Cleaning_Guidance.pdf (opened 2026-10-22)
- U.S. EPA, WaterSense: Showerheads: https://www.epa.gov/watersense/showerheads (opened 2026-10-22)
- U.S. EPA, WaterSense at Work, Section 3.4: Showerheads and Bath and Shower Diverters (May 2023): https://www.epa.gov/system/files/documents/2023-06/ws-commercial-watersense-at-work_Section_3.4_Showerheads_and_Diverters.pdf (opened 2026-10-22)
- Moen Solutions, Shower Faucet: Leaking, Two or Three Handle: Standard Valve: https://solutions.moen.com/Article_Library/Shower_Faucet:_Leaking-_Two_or_Three_Handle:_Standard_Valve (opened 2026-10-22)
- Aidacare, Installation guide: hand held shower (Australia): https://www.aidacare.com.au/globalassets/knowledge/resources-page/cat-service-user-guides/guides_for_installation_-_hand_held_shower.pdf (opened 2026-10-22)
As an Amazon Associate we earn from qualifying purchases.