How to Remove a Stuck Shower Head Step by Step
As an Amazon Associate we earn from qualifying purchases.
This guide explains how to remove a stuck shower head: start by hand, then hold the shower arm steady with a rag and pliers and loosen the head with an adjustable wrench, as the New Jersey Department of Health guide describes. The steps are short, but the sources do not give finish-protection instructions and do not say how to shut off the water. This guide covers the removal order, the likely causes of a stuck head, and the limits of what the sources say, and it stops at the head and the arm.
Quick answer
- Try the head by hand first, turning counterclockwise and gripping the head or its connecting nut, depending on the design.
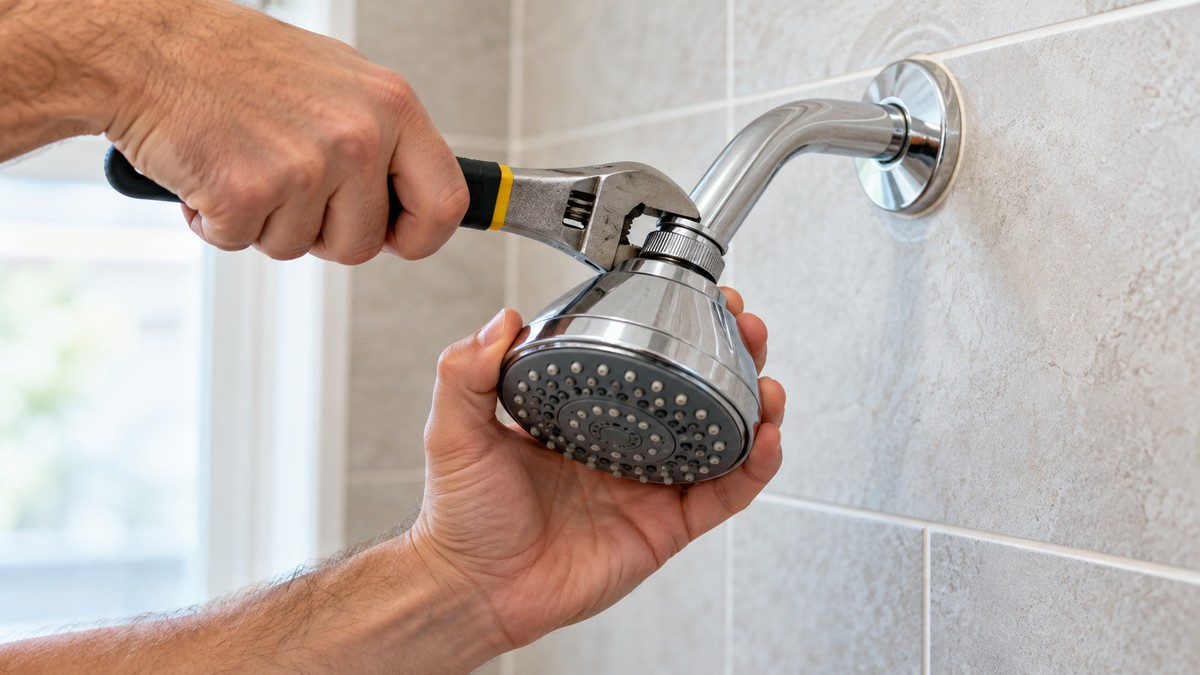
- If it will not turn, wrap the arm with a rag or cloth, hold it with pliers, and loosen the head with an adjustable wrench.
- For a connection that still will not move, DOE’s job aid describes a pipe wrench or channel locks at the arm, and it says to take care not to loosen the arm.
- No source gives finish-protection steps for removal. Use buffer material only where DOE describes it, for a head with no flat sides at the connection.
Before you pull
Look at the setup before you start. The removal steps in these sources do not say to shut the water off first. The New Jersey guide puts its water-off step later, when the arm threads are dried. None of the sources explains how to shut off a shower’s supply, so check your home’s plumbing before you begin.
Have these tools ready. The sources name them:
- An adjustable wrench for the head (DOE job aid; New Jersey guide).
- A rag or cloth, and pliers, to hold the arm (New Jersey guide).
- A pipe wrench or channel locks, for the connection at the arm if the head still will not move (DOE job aid).
- A piece of rubber or other buffer material, if the head has no flat sides at the connection (DOE job aid).
Both Moen handheld sheets give the same first step for removal: “Remove existing showerhead. Use wrench if necessary.” Those sheets cover handheld installs, but the removal step is the same wording on each, so it is a useful check for a fixed head as well.
What you are gripping
The New Jersey guide’s component list names four pieces: the shower arm, the connecting nut, the pipe threads on the arm, and the shower head. The head screws onto the threads of the arm. Some heads have a connecting nut, and the guide says to grip the head or the connecting nut, depending on the design. Check your head’s shape to see which one you have.
That matters for the tools. A wrench on the head, or on the connecting nut where there is one, turns the head. Pliers on the arm are for holding the arm still while you work, not for turning it. DOE’s caution to take care not to loosen the arm is about this difference. The sources do not give a way to tell from the outside whether a particular head has a connecting nut, so check the manual if you are unsure.
Removal steps
1. Try it by hand
The New Jersey guide says to try removing the head by hand first. Grip the head or the connecting nut, depending on how the head is built, and turn it counterclockwise. If it turns, unscrew it completely by hand and go to the arm-cleaning steps.
2. Hold the arm, then use a wrench on the head
If the head will not turn by hand, wrap the shower arm with a rag or cloth and use pliers to hold it in place. Then use an adjustable wrench to loosen the head, and finish unscrewing it by hand. The DOE job aid describes the same wrench step and adds a caution: take care not to loosen the shower arm while you work on the head. The goal is to free the head, so keep the arm from turning with it.
3. Protect a head with no flat sides
DOE’s job aid says that if the old head has no flat sides at the connection, you should wrap the connection with buffer material such as a piece of rubber before you use a wrench. The job aid is about gripping, so it does not describe how to protect a particular finish.
4. Use a pipe wrench or channel locks on the arm connection
If the connection at the arm still will not move, DOE says to use a pipe wrench or channel locks to loosen the connection at the shower arm. The job aid describes this as the step after the wrench on the head. It gives no force limit, so use the tool with care and stop if the arm starts to turn.
Why a head sticks
| What you find | Cause the sources name | What the sources say to do |
|---|---|---|
| The head will not turn by hand | not stated directly; the DOE job aid uses a loosening step at the arm connection | Hold the arm with a rag and pliers, then use an adjustable wrench on the head (New Jersey guide) |
| Old tape or residue on the arm threads | Existing thread sealant tape (New Jersey guide); old residue (DOE job aid) | Remove the existing tape, then clean the threads well (New Jersey guide; DOE job aid) |
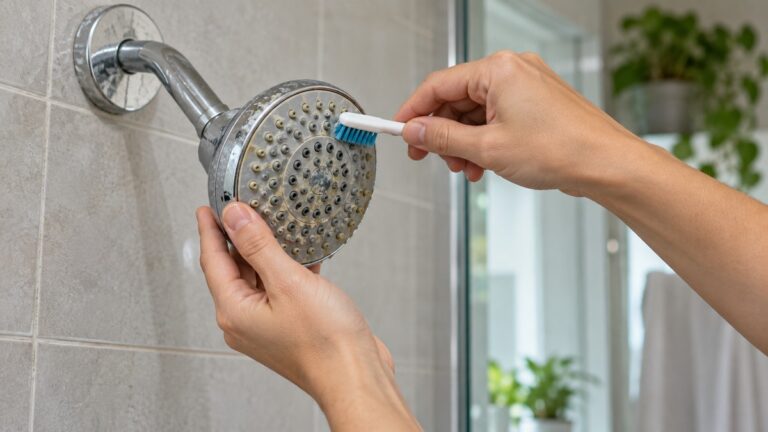
| Rust or mineral deposits on the threads | Rust and mineral deposits (New Jersey guide) | Clean them off with a cloth or toothbrush (New Jersey guide) |
| The arm turns when you pull on the head | The arm is not sturdy (New Jersey guide) | Wrap the arm with a rag and hold it with pliers. Take care not to loosen the arm (New Jersey guide; DOE job aid) |
| The head has no flat sides at the connection | No flat sides to grip (DOE job aid) | Wrap the connection with buffer material such as a piece of rubber (DOE job aid) |
| The head still will not move | not stated | not stated; the sources do not say what to do next |
Finish protection: what the sources cover
The Moen sheets include cleaning notes for Spot Resist stainless and brushed nickel finishes. They recommend a mild soap, a warm water rinse and a soft clean cloth. They say not to use abrasives such as abrasive sponges or steel wool, ammonia, bleach or sodium hypochlorite, organic solvents, or other harsh chemicals, including lime scale removers, because those may damage the finish. The sheets add that ignoring these instructions may void Moen’s warranty.
These are cleaning instructions for one finish family. They are not removal instructions. The sources do not give finish-protection steps for removing a head, and they say nothing about brass, nickel finishes other than Spot Resist, gold or matte black. If your head has one of those finishes, the sources do not tell you how to protect it during removal.
After the head is off
Once the head is off, the arm threads are the next thing to check. The New Jersey guide says to remove any existing thread sealant tape, clean off rust or mineral deposits with a cloth or toothbrush, and dry the threads before anything new goes on. Clean the threads before you put a head back, even if the head is only being cleaned. The New Jersey guide’s supplies list includes thread sealant tape, a cloth and a toothbrush, so have those ready before you reinstall or replace the head.
If the replacement head will sit on a slide bar, the guide to handheld heads on a slide bar covers that setup. If you would rather mount a handheld on a bar than on the arm, see shower bar mounts for a handheld head.
Mistakes to avoid
- Turning the arm instead of the head. Hold the arm with pliers while the wrench works on the head, as the New Jersey guide describes.
- Skipping the hand attempt. The New Jersey guide says to try by hand first.
- Gripping a head with no flat sides without buffer material. DOE says to wrap the connection with buffer material, such as a piece of rubber, first.
- Using abrasive or harsh cleaners afterward on a Spot Resist finish. Moen’s notes say to avoid abrasives, ammonia, bleach, solvents and lime scale removers.
- Reinstalling without cleaning the threads. The New Jersey guide says to remove old tape and clean off rust and mineral deposits first.
How we chose
This guide relies on four published sources, each opened on 2026-10-21. We chose them because each one gives a removal step, a cleaning step for the arm, or a finish note. The New Jersey guide is the main source for the order of steps, because it covers removing and cleaning a head from start to finish. The DOE job aid adds the wrench steps and the buffer material. The two Moen sheets are used for the removal wording and the Spot Resist cleaning notes only, and the cleaning notes are not used as removal instructions. We did not rank shower heads or pick a best product.
What we could not verify: what the sources do not say
- Finish protection during removal. No verified steps appear in the sources.
- Finish-specific care for brass, nickel finishes other than Spot Resist, gold or matte black. Not in the sources.
- Shower arm thread size. The sources do not state it. Confirm it on the arm or in the manual.
- How to shut off the water before removal. Not stated.
- What to do if the head still will not move after the steps above. Not stated.
- When to call a plumber. Not stated.
- A safe force or torque for the connection at the arm. Not stated.
- How common a stuck head is. Not stated.
Frequently asked questions
Will a wrench scratch the finish?
The sources do not verify finish protection for removal. DOE suggests buffer material only for a head with no flat sides at the connection. Moen’s finish notes cover cleaning, not removal. No source tells you how to protect a particular finish while the head is loosened.
Should I shut off the water first?
The removal steps do not say so. The New Jersey guide puts its water-off step when it dries the arm threads, after the head is off. The sources do not say how to shut off the shower supply, so check your home’s plumbing before you start.
What if the arm turns instead of the head?
Wrap the arm with a rag or cloth and hold it with pliers, as the New Jersey guide describes, and take care not to loosen the arm, as DOE’s job aid says. If the arm is part of a slide bar set-up, the guide to slide bar replacement parts covers those pieces. The sources do not describe how to tighten or repair an arm that moves.
How do I know whether old tape is the problem?
The sources do not give a diagnostic step. They say to remove any existing thread sealant tape and to clean the arm threads, so do both once the head is off. Then try the head by hand again, as the New Jersey guide’s first step describes.
Should I replace the head instead of removing it?
The sources do not address replacing a stuck head. The New Jersey guide mentions buying a new head as an alternative to cleaning an old one. If you do replace it, the guide to water-saving shower head options lists choices, but the sources do not rank them.
Is it normal for a head to be hard to remove?
The sources do not say how common it is. They name residue, rust, mineral deposits and an arm that is not sturdy as things to handle, and they describe wrench steps for a tight connection.
Bottom line
Start by hand, use a wrench on the head only with the arm held steady and with care, and clean the arm threads before anything new goes on. If the head still will not move, the sources do not say what to do next. Check the manual, or contact the manufacturer, since the Moen sheets direct installation help to Moen first.
Sources
New Jersey Department of Health, Guidance for Removing and Cleaning a Shower Head. https://nj.gov/health/cd/documents/topics/legion/ShowerHead_Cleaning_Guidance.pdf (opened 2026-10-21)
U.S. Department of Energy, Install a Low-Flow Showerhead, Weatherization Installer Job Aid 24-1. https://www.energy.gov/sites/default/files/2024-07/24-1_install-low-flow-showerhead.pdf (opened 2026-10-21)
Moen, Magnetic Docking Handheld Shower Instruction Sheet INS10567A. https://assets.moen.com/shared/docs/instruction-sheets/ins10567a.pdf (opened 2026-10-21)
Moen, Handheld Shower Installation Guide INS10819. https://assets.moen.com/shared/docs/instruction-sheets/ins10819.pdf (opened 2026-10-21)