Shower Cartridge Replacement for a Single Handle: How to
As an Amazon Associate we earn from qualifying purchases.
Searching for shower cartridge replacement single handle how to replace? The job is one most homeowners can plan from start to finish. The cartridge sits inside the valve behind the wall trim and controls the flow and temperature of the water going to the shower. It is a separate part from the showerhead. This guide follows the published steps from Moen and This Old House, covering how to shut off the water, remove the handle and retainer clip, pull the old cartridge, install the new one, and check for leaks.
Quick answer
- Shut off the water supply first, at the shutoff valves or at the main.
- Remove the handle and trim, free the retainer clip, then loosen and pull the old cartridge.
- Install the new cartridge with its tabs aligned, reassemble the valve, turn the water on, and check for leaks.
- Match the replacement cartridge to your valve model before you start. This Old House says to confirm the cartridge is the correct model for your valve.
How we chose these steps
Only the steps quoted from the four reference pages listed at the end are used here. Moen’s 1225 cartridge articles cover the Moentrol and Standard single-handle valves. This Old House’s article covers a single-handle valve in general. Moen’s shutoff article covers the water shutoff step. Each step below traces to one of these pages, and each quoted sentence was checked against the saved page text before publishing. The pages were read on 2026-10-22.
Tools and preparation
Moen’s 1225 articles list a “Phillips Screwdriver & Adjustable Wrench” as the recommended tools. This Old House lists more: a cartridge puller if needed, a caulk gun and silicone caulk, a flathead screwdriver, a Phillips screwdriver, pliers, the replacement cartridge, silicone grease, and towels or rags.
Moen also advises covering the drain before you begin. In its words, “We recommend covering the drain before beginning so to not loose any parts down the drain.” A small part that drops into the drain can be hard to recover.
Step 1: Shut off the water
Moen’s shutoff guide states: “Any repairs done to a Moen faucet require the water supply to be shut off.” Moen adds that failing to do so “could result in flooding or injury.” The shutoffs are generally under a sink, in a closet access behind a shower, or in an access panel around a tub. In some homes the shutoff is the main house valve. Moen says to turn the shutoffs clockwise until they are tightly closed, then open the shower handle to confirm the water is off.
Step 2: Remove the handle and trim
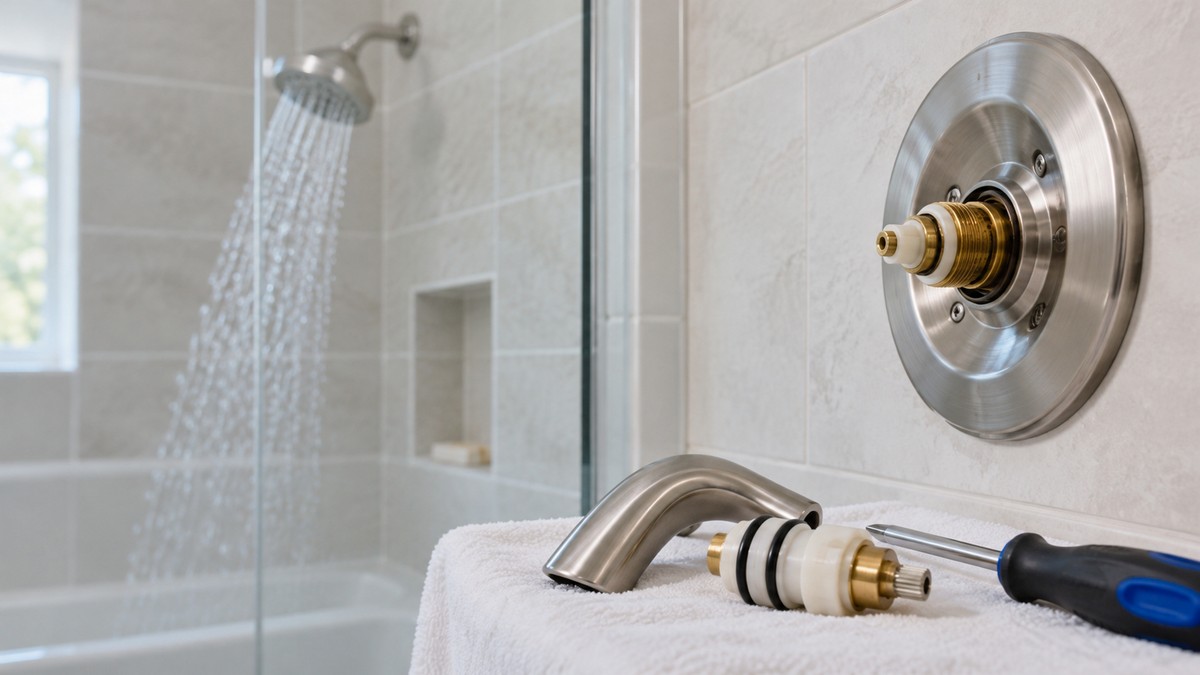
Moen’s 1225 articles assume the handle and its handle pieces are already removed, and direct readers to its faucet guide for handle details. This Old House describes the sequence for a common handle style. Start by prying off the index cap, the small decorative cover over the handle screw, then remove the screw underneath. Pry the cover plate off with a flathead screwdriver, then unscrew the escutcheon, the trim plate on the wall. Behind it is the valve body.
Step 3: Free the retainer clip
On Moen’s valves, the cartridge is held by a U-shaped copper retaining clip. Moen’s instructions say to “Lift the tab at the top of the U-shaped copper colored retaining clip (#5) just enough to grab it with your hand to fully remove.” Moen warns: “Be careful not to drop the clip behind the wall.” If you cannot reach the clip, Moen says you will need to remove the escutcheon.
Before the clip comes out, Moen’s steps also remove the stop tube and the “D” washer from the cartridge stem. Pull the stop tube forward until it is removed, then slide the “D” washer off the stem.
Step 4: Loosen and pull the old cartridge
Moen’s kit includes a plastic twisting tool. Moen instructs you to “rotate the cartridge (#6) 1/4 of a turn (90 degrees) in either direction” to loosen it. Then pull the stem out until it stops, grab the stem with pliers, and pull the cartridge out. Moen notes that “This may require some effort.”
This Old House gives the same general approach and cautions against forcing a stuck cartridge. Its plumbing expert Richard Trethewey says: “I’m afraid that if I just try to pull it this way with pliers, I could break it and leave parts inside the wall.” If the cartridge will not move, This Old House suggests a cartridge removal tool that works the cartridge back and forth.
Moen recommends cleaning and flushing the valve body before the new cartridge goes in.
Step 5: Install the new cartridge
Before installation, This Old House advises applying “a small amount of silicone grease to the O-rings on the new cartridge.” Moen says to slide the new cartridge into the brass valve body with the twisting tool, and that “The plastic tabs on the cartridge (#6) must be centered on the slots on the valve body (#7), which are located at the 12 and 6 o’clock positions.”
Moen then says to slide the copper clip back in on top of the cartridge. It warns: “If you encounter any resistance, do not force the copper clip (#5).” It also states that if the clip cannot be installed, “the water cannot be turned back on to the faucet until the copper clip (#5) is replaced.”
For hot and cold, Moen says to rotate the stem so the small notch faces down. The notch “determines the hot and cold location.” If hot and cold are reversed, Moen says to rotate the stem 180 degrees.
Step 6: Reassemble and test
Moen’s sequence finishes by sliding the “D” washer back onto the cartridge stem and the stop tube back onto the valve body. This Old House adds: “Apply a bead of silicone caulk around the back of the escutcheon plate for a watertight seal.” Then reattach the escutcheon and handle, turn the water supply back on, and test the shower.
Common problems after the swap
- Leaks: This Old House says to “check that all connections are tight, ensure the cartridge is properly seated, and verify that the O-rings are intact and correctly positioned.”
- Temperature control: This Old House says to “make sure the cartridge is installed in the correct orientation” and to check for debris in the valve body.
- Symptoms that prompted the job: This Old House lists “Difficulty adjusting water temperature”; “Dripping or leaking faucet when the shower is off”; and “Reduced water pressure” among signs of a faulty cartridge.
Keeping the new cartridge working
This Old House says that “Regular maintenance can extend the life of your shower cartridge and prevent future issues.” It lists three habits: “Avoid using harsh chemicals that can damage the cartridge.” “Clean your shower regularly to prevent mineral buildup.” and “Periodically check for leaks or changes in water pressure.” It also says “Maintenance checks can help you catch early signs of wear and tear, allowing you to address issues before they become larger problems.” and suggests “Consider having a professional inspection every few years.”
Mistakes to avoid
- Dropping the copper clip behind the wall. Moen warns about this specifically.
- Forcing the clip or the cartridge. Both sources warn against it.
- Installing a cartridge that does not match the valve. This Old House says to confirm the model.
- Setting hot and cold backwards. Moen’s fix is a 180-degree rotation of the stem.
How to decide whether to replace the cartridge
This Old House suggests that for flow that has dropped, a pressure-balancing cartridge can be removed and soaked before you decide to replace it. The article says to soak it “in a 50-50 vinegar-and-water solution for 24 hours” before deciding. This is one step to try before buying, and it is not a substitute for a new cartridge if the symptoms remain.
What we could not verify: what the sources do not say
- The Moen articles cover the 1225 cartridge. The sources do not give a full list of which handles or valve brands the cartridge fits.
- Delta and Kohler installation pages could not be read in this session. Delta’s pages returned a bot-check page, and a Kohler page returned a 403 error. Their procedures are not covered here.
- The sources do not say how long a cartridge lasts.
- The sources do not say whether a cartridge replacement changes water pressure from the supply line. This Old House lists reduced pressure as a symptom only.
- The sources do not cover the water heater, supply pipes, or the showerhead.
If your valve is not a Moen single-handle valve, check the manufacturer’s installation sheet for your model before following these steps.
Related guides on this site
If your problem is at the showerhead rather than the valve, see high pressure shower head water saving for a guide to pressure at the head. For a leaking hand shower, see replacement hose for Waterpik shower head. For parts that hold a shower slide bar, see shower slide bar replacement parts.
FAQ
Do I need to turn off the water before replacing a shower cartridge?
Yes. Moen’s shutoff guide says that “Any repairs done to a Moen faucet require the water supply to be shut off.” Turn off the valves, or the main supply if the shutoffs are not found, and open the handle to confirm.
How do I know which cartridge to buy?
This Old House says to “Make sure the new cartridge is the correct model for your shower valve.” Check the model on your valve or the manufacturer’s sheet before buying. The sources here do not give a part-matching method for every brand.
What if the retainer clip is lost behind the wall?
Moen says the water cannot be turned back on until the copper clip is replaced. Keep the clip in view while you work, and use the escutcheon removal step if you cannot reach it.
Why are my hot and cold reversed after the install?
Moen says the notch on the cartridge stem sets the hot and cold direction. Rotate the stem 180 degrees to reverse it.
Should I use silicone grease on the new cartridge?
This Old House says to apply “a small amount of silicone grease to the O-rings on the new cartridge” before installing it.
What do I do if the cartridge is stuck?
Do not force it. Trethewey warns that pulling with pliers can break the cartridge and leave parts in the wall. This Old House suggests a cartridge removal tool that works the cartridge back and forth.
Bottom line
A single-handle cartridge swap follows a fixed order: shut off the water, remove the handle and trim, free the retainer clip, pull the old cartridge, seat the new one with its tabs aligned, and test. The manufacturer steps and This Old House agree on the core sequence. The sources do not cover every valve brand, so check your model before you buy or start.
Sources
- Moen Solutions, “1225 Cartridge: Single Handle Shower-Moentrol Valve,” https://solutions.moen.com/Article_Library/1225_Cartridge:_Single_Handle_Shower-Moentrol_Valve (opened 2026-10-22)
- Moen Solutions, “1225 Cartridge: Single Handle Shower-Standard Valve,” https://solutions.moen.com/Article_Library/1225_Cartridge:_Single_Handle_Shower-Standard_Valve (opened 2026-10-22)
- Moen Solutions, “How to Turn Off the Water Supply to the Faucet,” https://solutions.moen.com/Article_Library/How_to_Turn_Off_the_Water_Supply_to_the_Faucet (opened 2026-10-22)
- This Old House, “How To Replace a Shower Cartridge,” https://www.thisoldhouse.com/bathrooms/how-to-replace-a-shower-cartridge (opened 2026-10-22)