do-it-yourself-shower-installation
As an Amazon Associate we earn from qualifying purchases.
A do it yourself shower installation can mean a showerhead and arm swap on an existing shower, and that is the job this article covers. The two sources checked for this article describe bigger jobs: a full tub-to-shower conversion and a fiberglass tub and surround. Their steps for turning off the water, removing a showerhead, fitting threaded pipe and checking for leaks apply to a head swap. Their steps for demolition, drains, subfloors and tiling do not, and this article leaves them out.
Quick answer
- Scope: this article covers replacing a showerhead and its arm. It does not cover plumbing rough-in, valves, drains or subfloors.
- Shut off the water before you start. Family Handyman says to turn off the water to the bathroom before working on the supply.
- Unscrew the old head and wrap the wrench jaws with a cloth to prevent damage, if you plan to keep the old parts.
- Use plumbing thread tape on the threads. Family Handyman lists it among the materials.
- After the new head is on, run the water and check the connections for leaks.
What this article covers
A showerhead swap means taking off the existing head, and in many cases the arm it screws onto, then installing a new head and arm into the same threaded fitting in the wall. The sources describe that fitting as a threaded elbow. Family Handyman describes the pipe in a new installation as one that “should terminate with a 1/2-inch metal threaded elbow anchored to the studs.” That description is about a new build, not a replacement. It is the only place either source names the thread size, and the sources do not say whether an existing shower in your home uses the same size.
Both sources also describe work this article does not cover. Family Handyman’s full job includes cutting the old P-trap, running new drain pipe and mounting a new shower valve. The This Old House article covers removing a tub, setting a ledger board and fitting a fiberglass surround. A reader who needs any of that work should read the full guide and, where the source recommends it, call a professional.
Family Handyman states that structural repairs are a job for a contractor. It says: “When structural repairs to the subfloor are needed, you’re probably better off leaving that part of the job to a contractor.” The head swap in this article does not involve the subfloor, but a reader who finds rot or damage behind the wall should stop and get help.
Tools and materials
The sources do not give a tool list for a showerhead swap. The tool lists they do give are for the full jobs. Family Handyman’s list for its shower base project includes an adjustable wrench, slip-lock pliers, a pencil and a utility knife, among others. Its materials list includes “Plumbing thread tape.” The This Old House list for its fiberglass tub project includes pliers, a screwdriver and a caulk gun, and its materials list includes silicone caulk.
For a head swap, the sources support these items: an adjustable wrench or pliers to remove the old head, a cloth to protect the finish, and plumbing thread tape for the threads. The sources do not say which wrench size fits a particular showerhead, and they do not say whether a given head needs a gasket or a washer.
Before you start: turn off the water
Turn off the water before you unscrew anything. Family Handyman says: “Turn off the water to the bathroom and cut the supply pipes to the existing valve.” That sentence belongs to a full valve replacement, where the pipes are cut. A head swap does not cut pipe, so the sources do not say whether closing the bathroom’s shut-off valve alone is enough for your home. Check that the water is off before you loosen the head.
This Old House lists “Shutting off the water supply” as a step before removing fixtures. The article does not say how to find or operate the shut-off valve for a shower.
The sources do not give a rule for how tight a showerhead or arm should be. Neither source says “do not overtighten” in those words. Follow the manufacturer’s instructions for the head you buy, and the sources do not add any torque figure.
Removing the old head
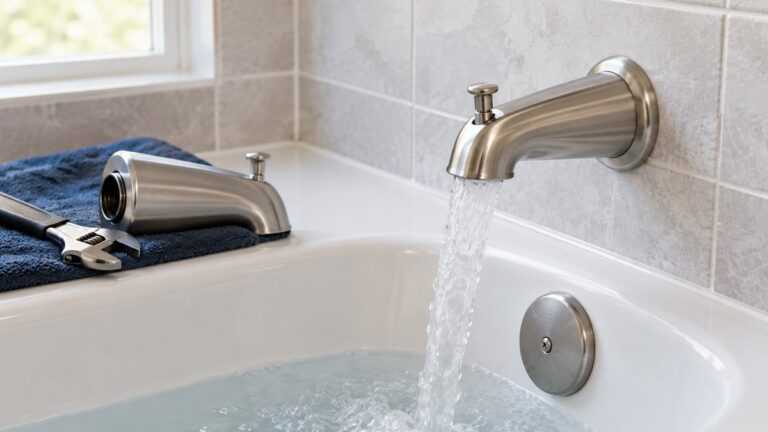
Family Handyman describes removing a head as the first step in its tub job: “First, unscrew the shower head and the bathtub spout. If you want to reuse either of these, wrap the jaws of your wrench or pliers with a cloth to prevent damage.” The step is short, and the source does not describe how an arm that is stuck, corroded or fixed to the wall should be handled. The sources do not say how to remove a stuck arm.
If you plan to keep the old head, the cloth step is the one the sources give. Wrap the jaws of the wrench before you turn the fitting so the finish is not marked.
Fitting the new head and arm
The sources do not give a full set of steps for threading in a new arm. What they say is limited. Family Handyman’s new-installation step says the threaded elbow is where “you’ll screw the shower arm into this fitting” once the walls are finished. In practice, that means the arm screws into the existing threaded fitting in the wall, and the head screws onto the arm.
Wrap the threads of the arm with plumbing thread tape before you screw it in. Family Handyman lists plumbing thread tape as a material, but the source does not describe how many wraps to use or which direction to wind it. The sources do not say whether a given head or arm needs a gasket.
This Old House gives the one tightening instruction in the sources: “use pliers to tighten all connections securely.” That line is written for a tub installation, and the sources do not say how far to turn the arm or the head. Tighten until the joint is snug and does not move, and do not force it past that point. The sources do not state a torque or turn limit.
If the fitting in the wall turns when you try to tighten the arm, stop and check. The sources do not describe a fix for a fitting that turns in the wall, and the sources do not say whether the pipe behind it needs repair. A reader who sees this should not keep turning the fitting.
The sources do not say whether a new head needs to match the arm’s thread size, its length or its finish. Check the product’s own instructions for those details before you buy.
Check for leaks
After the new head is on, turn the water back on and check the joint. This Old House says to “Inspect the shower valve and tub spout for leaks, and run water through the shower and tub faucet to ensure proper flow and drainage.” For a head swap, the part to check is the joint between the arm and the wall fitting, and the joint between the head and the arm. Watch the joints while the water runs, then dry them and look again.
The sources do not give a time to wait before the leak check, and they do not describe a pressure test. If a joint drips, the sources do not say how to fix it beyond checking the connection and the thread tape.
Family Handyman says a pre-formed base is “virtually leakproof,” but that statement is about the base in a full install, not about a showerhead joint, so it does not support any leak claim for a head swap.
Mistakes to avoid
- Working with the water on. The sources say to turn the water off before work on the supply, and this article applies the same rule to the head.
- Gripping the finish with bare jaws. Family Handyman says to wrap the jaws with a cloth to prevent damage.
- Assuming a full-install step applies to a head swap. The valve, drain and subfloor steps in both sources are for larger jobs.
- Tightening the joint past snug. The sources give no torque figure, so use the manufacturer’s instruction and stop when the joint is firm.
Before you buy: check the height and size
A new head is easier to choose once you know where it will sit. The height guide covers where the head should be placed, and the size guide covers the spray area. Read what height a shower head should be before you set the arm, and what size shower head you should get before you choose a head.
What we could not verify: what the sources do not say
- The sources do not describe a showerhead swap as a stand-alone job. Both are full-project guides.
- The sources do not give the thread standard for an existing shower arm. The one thread size they name, 1/2-inch metal threaded, is in a new-installation step.
- The sources do not say which wrench size fits a showerhead or an arm.
- The sources do not say how tight to make a showerhead or arm joint.
- The sources do not say how many wraps of thread tape to use or which direction to wind it.
- The sources do not say how to shut off the water for a shower alone, or how to find the shut-off valve in a given home.
- The sources do not describe a leak test longer than a run of water and a visual check.
- The This Old House source covers a fiberglass tub and surround, not a shower-only unit. Its steps for the valve and the leak test are the ones this article uses, and they are written for a tub.
- The sources do not say what to do with a stuck or corroded arm, or with a fitting that turns in the wall.
- The sources do not give a code or permit rule for a showerhead swap. Family Handyman says to apply for a plumbing permit for its full project, and the sources do not say whether a head swap needs one.
FAQ
Do I need to turn off the water before replacing a showerhead?
Family Handyman says to turn off the water to the bathroom before work on the supply. Its wording is for a valve replacement, and the sources do not say whether closing the bathroom shut-off alone is enough for a head swap in your home. Confirm the flow has stopped before you loosen anything.
Do I need a plumbing permit for a showerhead swap?
The sources do not say. Family Handyman advises applying for a plumbing permit for its full shower base project, which includes new drain and valve work. The sources do not say whether a head and arm swap needs a permit, so ask your local building department.
Should I use plumbing thread tape on the arm?
Family Handyman lists plumbing thread tape among its materials. The sources do not say how many wraps to use or which direction to wind it.
How tight should the joint be?
This Old House says to “use pliers to tighten all connections securely.” The sources do not give a torque or turn limit. Tighten until the joint is firm and stop there.
Is the This Old House source a shower guide?
No. It covers a fiberglass tub and surround. Its valve and leak-test steps are used here because they apply to any fixture with a supply and a spout, but the sources do not say they cover a shower-only unit in every detail.
How we chose
This article uses two sources, both read on 2026-10-28. The first is Family Handyman’s shower base guide, a home-improvement publisher. The second is This Old House’s fiberglass tub and surround guide, from a second home-improvement publisher. The two publishers are separate organizations.
The steps and quotes come only from those two pages. Each quoted sentence was checked against the saved text of the page before this draft was written. Retail listings and Amazon pages were not used for install steps. The source check also reviewed a set of valve and temperature pages, but those are not used here for install steps.
Sources
- Family Handyman, “How to Install a Shower Pan” (Chris Deziel), https://www.familyhandyman.com/project/plumb-install-a-shower-base/ (opened 2026-10-28). Used for the tools and materials list, turning off the water, removing the head, the threaded elbow and thread tape.
- This Old House, “How To Install a Fiberglass Tub and Surround” (Richard Trethewey), https://www.thisoldhouse.com/bathrooms/how-to-install-a-fiberglass-tub-and-surround (opened 2026-10-28). Used for the shut-off step, the tightening instruction and the leak check. This is a tub-and-surround guide, not a shower-only guide.