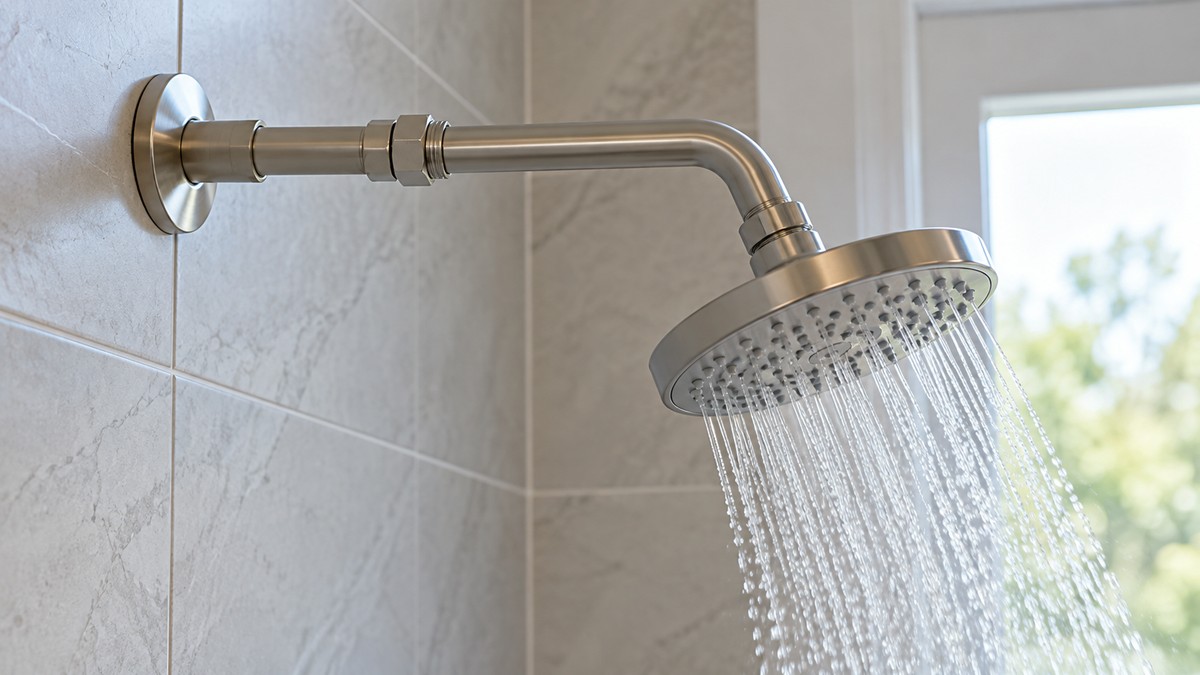
How to Extend a Shower Arm
As an Amazon Associate we earn from qualifying purchases.
How to extend a shower arm is a question the install sheets answer only in part. Most sheets cover how an arm attaches to the wall connection. The sheets that describe changing how far the arm projects from the wall do it by changing a pipe in the wall, which is plumbing work. None of the sources for this guide is a sheet for an add-on extension piece that sits between the arm and the head, so the steps below cover what the sheets do say and where the job stops being a homeowner task.
Quick answer
- “Extend” can mean two jobs. One sets how far the arm sits past the wall, which Kohler’s sheet does with a pipe nipple inside the wall. The other adds a piece between the arm and the head, and no opened sheet covers that.
- Work on the wall side is plumbing. Kohler’s sheet says to “Observe all local plumbing and building codes,” and to “Shut off the main water supply” first.
- The sheets disagree on thread sealant. Kallista says to use sealant tape and “Do not use thread sealant compound (pipe dope).” Moen’s adjustable arm sheet says to apply “thread seal tape or pipe dope” to the threads.
- After any change, flush the line and check for leaks before you install the head. Kohler says to run hot and cold water through the arm to flush out dirt and debris.
Two meanings of extend
The first meaning is the projection of the arm from the finished wall. Kohler’s shower arm sheet for models K-9511 and K-9512 gives a model-specific distance for a pipe nipple. Its note reads “For Model K-9511: Extend the pipe nipple 1 (2.5 cm)” beyond the finished wall, and it gives a longer distance for K-9512. The nipple is inside the wall, so this is wall-side plumbing. The sheet says to install a pipe nipple to the distance listed for your model, then thread the arm onto it.
Kallista’s long-arm sheet, model P24762, uses a similar approach. It has you install a male pipe nipple that extends about 13 mm beyond the finished wall, then tells you to “Thread the shower arm to the pipe nipple.” The sheet lists plumbers putty and sealant tape for the connection, and it refers to the faucet manufacturer’s instructions for roughing-in specifications. Roughing-in is the rough plumbing inside the wall, which this guide does not cover.
The second meaning is an add-on piece between the arm and the head. The sources opened for this guide do not include a sheet for that kind of extension. Without one, the post cannot state a fit, a maximum length or a load rating for an extension piece, and the sources give no reason to assume one will suit every arm.
Where the work becomes plumbing
Several sheets draw a line between the arm and the wall. Waterworks’ sheet for a wall or ceiling arm says the product “must be installed by a professional licensed contractor and must” be on site before rough-in. That sheet is a product requirement, so it applies whatever arm you buy.
Kallista’s wall-plate arm sheet, model P21441, shows the wall side in detail. It says to “Install the elbow and water supply prior to installing the finished wall,” and it includes “Drill a 1-1/8″ (29 mm) hole at the water supply line location.” Drilling and setting anchors are steps in a plumbing job, and this guide does not cover them.
If an extension would need a new nipple, a drilled hole, or any change to the supply line, stop there. The sheets send that work to a licensed plumber or to the rough-in instructions for the faucet, and that is the right place for it.
Steps the sheets share for an arm change
Once the wall side is settled, the arm work is a short sequence. Start by protecting the drain. Speakman’s sheets for two wall arms say to “Cover your drain to prevent loss of parts.” Then clean the threads. The DOE installer aid says to “Clean threads of shower arm well” before a connection is made.
Apply sealant to the correct end. Speakman’s sheets say to apply thread seal tape to the inlet side of the arm. Kohler’s sheet says to “Apply thread sealant to the shower arm adapter.” The Kallista sheet says to use sealant tape on the arm threads, not pipe dope. The point of the sheet’s choice is the same in each case: the threads need a seal, and the sheet names the material.
Thread the arm on by hand where you can, then tighten with a strap wrench. Kohler says to “Using a clean strap wrench, securely tighten the shower arm to” the pipe nipple. Kallista’s long-arm sheet says to “Use a clean strap wrench to securely tighten the shower arm.” Waterworks says to “Use only a strap wrench or protected/smooth-jaw wrench on any finished surface.” That last point is a finish protection step, and the Moen adjustable arm sheet adds a related rule, which is not to use the arm as a lever on the inlet tube.
Speakman’s sheets also warn against over-tightening. They say connections can be damaged if they are overtightened, which is the reason to stop at snug on the sealed threads.
Flush the line before the head goes on. Kohler says to run hot and cold water through the arm “to flush out dirt and debris.” Waterworks says to run cold and hot water for several minutes and check all connections for leaks. Kallista says to “Check connections for leaks. Repair as needed.” If a connection leaks, the New Jersey guidance says to re-wrap the threads with sealant tape and tighten carefully.
Where the sheets disagree
Thread sealant is the clearest disagreement. Kallista says to use sealant tape on the arm threads and not pipe dope, because compound can plug the spray outlets of the head. Moen’s adjustable arm sheet, INS11990, says to “Apply thread seal tape or pipe dope to threads on chosen” inlet tube. Those two instructions are not the same, and the sheet for your arm should decide the matter.
Moen’s two handheld sheets also differ. INS10567A says to “Add thread seal tape to shower arm threads.” INS10819 says “Thread seal tape is not recommended for this project.” Those are different products and different installs, so the sheet for your product is the only guide to follow.
The DOE installer aid says to “Use thread tape at all connections,” and the New Jersey guidance describes wrapping thread seal tape clockwise. Both support tape, but neither addresses a pipe dope choice. The rule that holds across the sources is to follow the sheet for the arm.
Extension pieces and alternatives
An add-on extension between the arm and the head is a separate product, and its instructions come from its own maker. If you cannot get a sheet for the exact piece, do not assume the arm sheets above cover it. A longer reach without drilling is also a separate question, and this site covers those options in other guides: a hand-held shower head extension hose, a drill-less shower slide bar, a sliding shower head, and a shower bar for a shower head.
Those options change the height or reach of the head without changing the wall pipe. The sources in this guide do not compare them, and this post does not rank them.
How we chose
This post uses twelve sources. Eight were opened on 2026-10-22: the Kohler, Kallista, Waterworks, Speakman and Moen arm sheets. Two of those sheets, the Speakman and Moen copies, are hosted by a distributor, and the host is shown in the source list. Four come from the existing library and were opened on 2026-10-21: the DOE installer aid, the New Jersey guidance, and two Moen handheld sheets. The criteria were manufacturer install sheets that name the parts and steps for an arm or a connection, plus one government installer aid and one state health guidance. A vendor blog that describes a drill-free extender was not used, because it is a retailer page and does not give a manufacturer’s steps. Pages that returned errors were left out. The post does not rank products or recommend a model.
What we could not verify: what the sources do not say
- No opened source is an install sheet for an add-on extension piece between the arm and the head.
- No source gives a maximum extension length, a load rating, or the effect of an extension on spray or flow.
- Thread sizes are listed on several sheets, but this post does not repeat them. Check the arm, the fitting, or the manual for the size that matches.
- The sheets disagree on sealant, and no source says which choice fits every arm.
- The projection figures in the Kohler sheet are for models K-9511 and K-9512 only. The sources do not say what projection other arms need.
- Local plumbing requirements are not stated beyond the general instruction to follow local codes.
Frequently asked questions
Can I extend a shower arm myself?
Part of the job is an arm change that the sheets describe in steps: protect the drain, seal the threads, thread the arm on, tighten with a strap wrench, flush, and check for leaks. Work inside the wall, such as a nipple, a drilled hole or roughing-in, is plumbing work, and the sheets send it to a licensed contractor or to other instructions.
Which thread sealant should I use?
Follow your arm’s sheet. Kallista says sealant tape, not pipe dope, because compound can plug the spray outlets. Moen’s adjustable arm sheet allows tape or pipe dope. The sources do not settle the question for every arm.
How tight should the arm be?
Tight enough to seal, using a strap wrench for the arm. Speakman’s sheets warn that connections can be damaged by overtightening, and Waterworks says to use a strap wrench or a protected wrench on any finished surface.
What do I check after the change?
Run hot and cold water through the arm to flush debris, then check every connection for leaks. Kallista says to repair any leak before you finish.
How far can the arm project from the wall?
That depends on the model. Kohler’s K-9511 sheet lists 1 inch (2.5 cm) beyond the finished wall, and its K-9512 sheet lists a longer distance. Check your own model’s sheet. Those distances are for the pipe nipple inside the wall, which is plumbing work.
Is there a sheet for an extension piece?
Not among the sources opened here. Get the maker’s sheet for the exact piece before you buy or install it, and do not assume an arm sheet covers an extension.
Bottom line
If the change stays between the wall connection and the head, follow the arm’s sheet for the sealant and the tightening. If the change involves the wall pipe, a drilled hole or roughing-in, stop and call a licensed plumber.
Sources
- Kohler, shower arm installation guide 1016117-2, https://techcomm.kohler.com/techcomm/pdf/1016117-2.pdf (opened 2026-10-22)
- Kallista, shower arm installation instructions 1193441-2, https://techcomm.kohler.com/techcomm/pdf/1193441-2.pdf (opened 2026-10-22)
- Kallista, shower arm installation instructions 1226929-2, https://resources.kohler.com/interiors/kallista/pdf/1226929-2.pdf (opened 2026-10-22)
- Kallista, shower arm installation instructions 1211608-2, https://techcomm.kohler.com/techcomm/pdf/1211608-2.pdf (opened 2026-10-22)
- Waterworks, formwork wall and ceiling mounted shower arm installation guidelines, https://assets.waterworks.com/wasset/15/original/90815.pdf (opened 2026-10-22)
- Speakman, shower arm instructions 92-CDS2501-01, distributor-hosted copy, https://zoro.com/static/cms/enhanced_pdf/Speakman%20Co_92CDS250101.pdf (opened 2026-10-22)
- Speakman, shower arm instructions S-2540, distributor-hosted copy, https://zoro.com/static/cms/enhanced_pdf/Speakman%20Co_uaalav2ertdzdmimpcxexx2d5af5.pdf (opened 2026-10-22)
- Moen, adjustable shower arm installation guide INS11990, distributor-hosted copy, https://zoro.com/static/cms/enhanced_pdf/Tigris%20Fulfillment%20Partners,%20LLC_ins11990xx6ed4f6.pdf (opened 2026-10-22)
- U.S. Department of Energy, Weatherization installer job aid 24-1, https://www.energy.gov/sites/default/files/2024-07/24-1_install-low-flow-showerhead.pdf (opened 2026-10-21)
- New Jersey Department of Health, “Guidance for Removing and Cleaning a Shower Head,” https://nj.gov/health/cd/documents/topics/legion/ShowerHead_Cleaning_Guidance.pdf (opened 2026-10-21)
- Moen, magnetic docking handheld shower instruction sheet INS10567A, https://assets.moen.com/shared/docs/instruction-sheets/ins10567a.pdf (opened 2026-10-21)
- Moen, handheld shower installation guide INS10819, https://assets.moen.com/shared/docs/instruction-sheets/ins10819.pdf (opened 2026-10-21)