Plan an Adhesive Shower Head Holder Installation
As an Amazon Associate we earn from qualifying purchases.
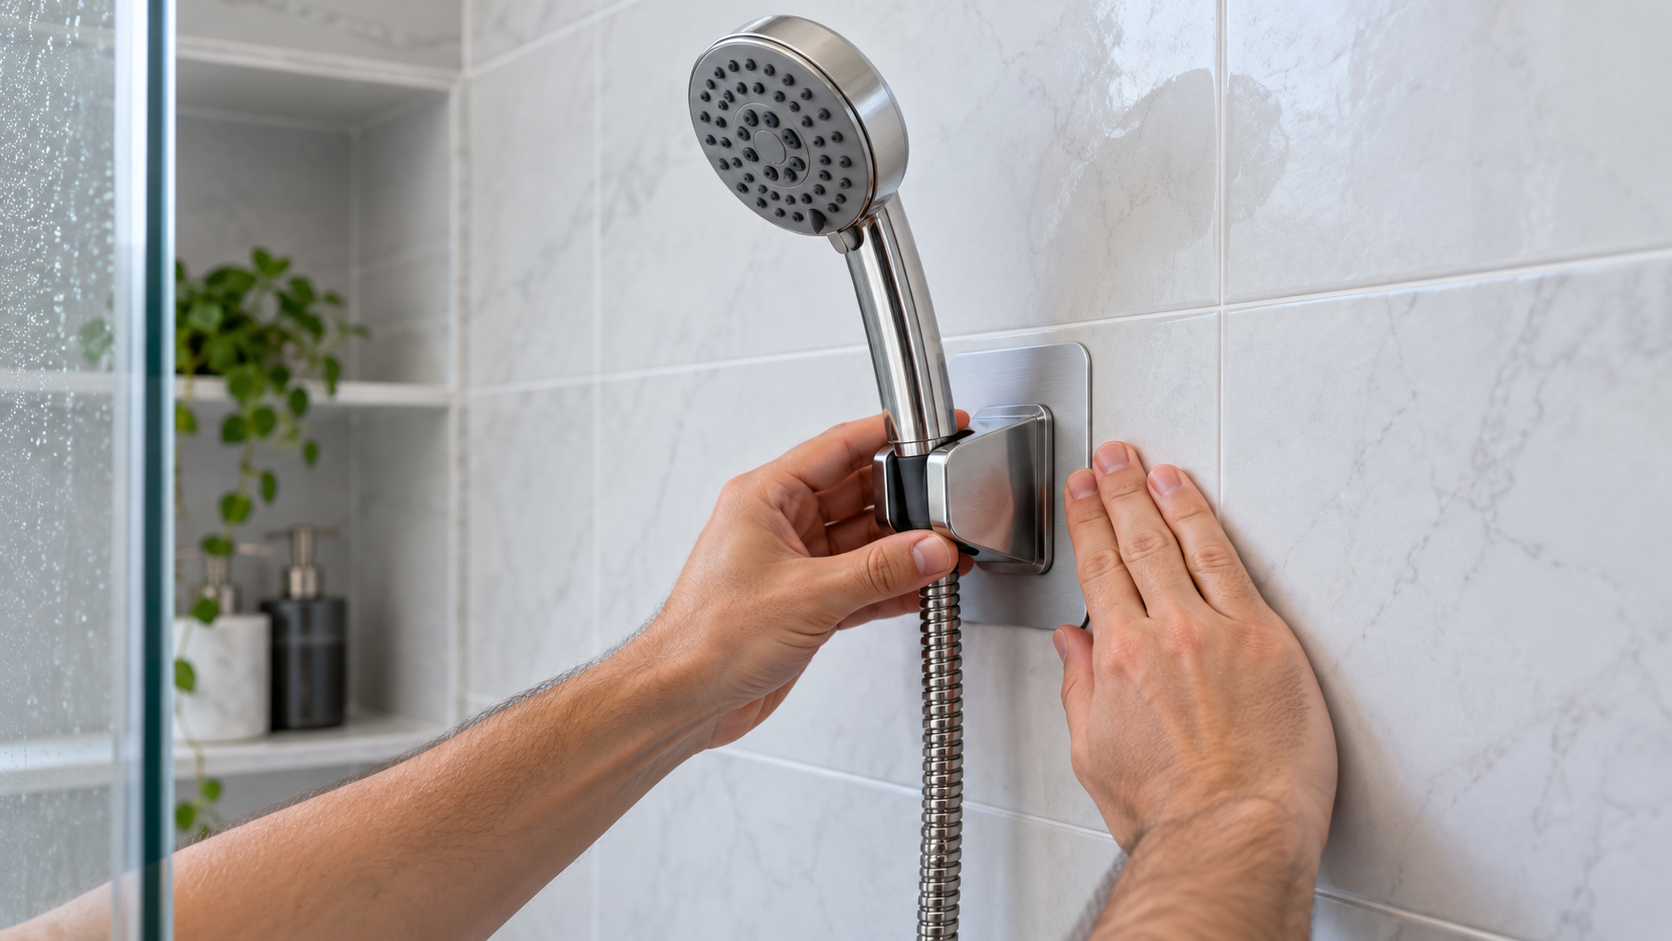
Shower head holder installation planning for adhesive mounting starts with the wall, not the peel-off liner. Confirm that the holder’s own instructions approve your surface, check that the handset fits the cradle, and choose a spot where the hose hangs without pulling sideways. Then clean and dry the exact footprint, apply the mount in its specified orientation, and leave it unloaded for the full cure period in the manual. Stop if the surface is porous, loose, heavily textured, or outside the maker’s approved list; an adhesive pad cannot repair a bad mounting surface.
Quick answer
- Match the holder manual to the wall material before opening the adhesive.
- Dry-fit the handset and hose, including the clearance needed to lift the handset out.
- Use only the preparation method and cure time specified by the holder maker.
- After curing, check stability with the shower off before loading the holder in normal use.
Start with three compatibility decisions
An adhesive mount may look universal, but three separate fits decide whether the installation is sensible: the adhesive-to-wall fit, the handset-to-cradle fit, and the placement-to-user fit. Treating those as separate checks prevents the common mistake of proving only that the pad sticks.
1. Is the wall on the approved list?
Read the instructions packaged with the exact holder. The Waterpik manual used for this guide calls for a smooth area and says to avoid heavily textured areas. It also says not to apply its bracket directly to drywall or another water-permeable surface. The 3M page for its Command Handheld Shower Head Holder lists glass, metal, mirror, tile, laminates, finished woods, and painted surfaces. Those lists are product-specific. One maker approving painted surfaces does not prove that a different adhesive pad will hold on paint.
Inspect more than the material name. Reject a location with lifting paint, cracked tile, loose laminate, failing caulk, soap film, or a grout line crossing the pad footprint. An adhesive joint is only as stable as the layer beneath it. If the instructions require screws for your surface, do not replace that method with an unlisted tape. High Sierra, for example, gives an acrylic-and-fiberglass method that uses both a sticky pad and screws.
2. Does the handset actually seat in the holder?
Before removing any liner, place the handset or the tapered hose nut in the cradle as the holder design intends. Check that it drops fully into the opening and can be lifted out without twisting. A bracket can be firmly attached yet still be unusable if the cradle is too narrow, too shallow, or reversed.
Orientation matters. Waterpik specifies that the large opening of its wall bracket faces up. Do not generalize that detail to a holder with different geometry; find the top mark, arrow, or diagram for your model. If the manual is missing and the top cannot be identified confidently, pause and request instructions from the seller or manufacturer.
3. Can the hose hang without becoming a lever?
Hold the handset at the proposed height while the hose is connected in its normal route. The hose should form a relaxed curve rather than pulling the handset down or sideways. Waterpik warns not to pull or tug its flexible hose because the shower head can come loose and fall. Keep the hose away from a door edge, control handle, shelf corner, and the user’s normal standing path.
Also simulate removal. The opened Waterpik manual requires at least 10 inches above its bracket so the handset can be lifted out. Measure the requirement from your own manual; the relevant clearance is the distance needed by that handset and cradle, not a universal bathroom dimension.
Make a placement card before you clean
Write down four items: approved surface, required preparation, cure time, and rated load. Add the chosen height and removal clearance. This small record keeps instructions from two different products from being blended during installation.
| Decision | Evidence to record | Stop condition |
|---|---|---|
| Surface | Exact wall material appears in the holder instructions | Porous, loose, damaged, or excluded surface |
| Fit | Handset seats and lifts out in a dry fit | Cradle pinches, tips, or releases the handset |
| Placement | Hose hangs in a relaxed curve | Hose pulls sideways or catches an obstacle |
| Cure | Manual’s temperature and wait period noted | Room or wall conditions fall outside the instructions |
A useful clearance check is: available lift space = ceiling height minus the top of the mounted bracket. Compare that result with the removal clearance stated by the holder maker. This calculation does not choose a height for you; it exposes a location where the handset cannot be removed normally.
Gather only the materials named by the maker
Typical preparation may involve a clean disposable cloth, a dry cloth, painter’s tape for temporary position marks, and the holder’s supplied adhesive. Do not substitute a household cleaner, construction adhesive, extra foam tape, or silicone unless the manufacturer calls for it. Residue left by a cleaner can interfere with a pressure-sensitive adhesive, and an added layer changes the joint the load rating was based on.
Waterpik specifies a solution of 50% isopropyl alcohol and 50% water for its bracket, followed by a dry wipe. That is evidence for the Waterpik method only. If your instructions name a different cleaner, preparation time, or temperature range, those directions control.
Install in an order that protects the adhesive
- Turn the shower off and remove the handset from the work area. The wall should not be receiving spray while it is being prepared.
- Dry-fit the complete arrangement. Mark the bracket outline lightly with removable tape. Verify user reach, hose slack, cradle orientation, and overhead removal space.
- Inspect the footprint. Move away from grout joints, chipped glaze, loose coatings, caulk, and strong texture unless the product instructions explicitly approve them.
- Prepare the surface exactly as directed. Clean the whole adhesive footprint, not just its center, and let it become fully dry.
- Handle the pad by its edges. Remove the liner without touching the bonding face. Align once; repeated contact and repositioning may compromise a single-use strip.
- Press in the specified orientation. Apply the pressure and duration stated in the manual. Keep the bracket still rather than testing it immediately.
- Leave the holder unloaded. Follow the full cure period. Waterpik explains that its adhesive develops strength progressively, reaching approximately 50% after 20 minutes, 90% after 24 hours, and 100% after 72 hours at room temperature. That schedule belongs to the Waterpik bracket; use your manual’s schedule for another holder.
- Load it carefully after curing. With the shower off, seat the handset, confirm the large opening or top mark is correctly oriented, and watch for edge lift or rotation.
Use a stability check, not a pull test
Do not yank the hose to prove the mount is strong. After the required cure period, place the handset in the cradle with the water off. Confirm that the handset rests fully, the holder does not rotate, and all edges of the adhesive remain flat. Remove and replace the handset several times using the normal upward motion. Then route the hose and confirm that it does not tension the bracket.
If your holder has a published load limit, include every supported item in the comparison. The 3M product page lists a maximum of 4 lb for its named holder. A simple check is: load margin = listed holder limit minus handset-and-hose load placed on the holder. Use measured weight only if you can weigh the complete supported assembly. A positive margin does not override surface or installation restrictions.
When adhesive mounting is the wrong plan
Stop when the wall is porous, crumbling, heavily textured, wet behind the finish, or covered by a coating that is lifting. Stop if the holder manual requires anchors or screws for that surface. Stop if the hose constantly pulls across the bracket or the user must tug the handset to remove it. These are fit problems, not reasons to add more adhesive.
Drilling through a shower surround creates a waterproofing and concealed-services question beyond this adhesive-only job. If the approved alternative requires drilling and you cannot identify the wall construction, waterproofing method, and hidden plumbing or wiring, ask a qualified professional or the enclosure manufacturer for the correct mounting method.
Rental-bathroom removal planning
“No drill” does not automatically mean “no damage.” Keep the package directions for removal and obtain landlord approval when the lease requires it. Photograph the original surface and avoid mounting over weak paint, damaged grout, or an existing repair. The 3M product page describes clean removal for its specific water-resistant strips, but that promise should not be transferred to unrelated tape or to a surface the instructions exclude.
If the holder must later move, use the maker’s removal procedure. Do not pry a rigid bracket away from tile with a metal tool. If removal instructions are unavailable, contact the maker before installation; discovering the method after bonding is too late.
How we chose
This guide uses an opened Waterpik installation manual for the ordered adhesive-mount steps, orientation, cleaning solution, clearance, cure progression, and use warnings. The 3M manufacturer page provides a separate example of stated surfaces and a product-specific load limit. High Sierra’s installation page shows why surface-specific instructions matter: its method for acrylic and fiberglass combines adhesive with mechanical fasteners. The sequence therefore prioritizes compatibility, dry fit, preparation, cure, and a gentle stability inspection.
What we could not verify
The sources do not establish one adhesive, cure time, load rating, removal method, or approved-surface list for every shower head holder. They do not show that adhesive-only mounting is suitable for natural stone sealers, textured tile, flexible surrounds, or painted walls in general. They also do not provide a universal method for repairing a failed mount. Those decisions must come from the exact holder instructions and the wall or enclosure manufacturer.
FAQ
Can I place an adhesive holder across a grout line?
Avoid doing so unless the holder maker expressly approves it. A grout line can interrupt full pad contact and may be more porous than the tile face. Choose a continuous approved surface large enough for the entire adhesive footprint.
How long should I wait before hanging the shower head?
Use the period in the exact manual. Waterpik reports progressive bonding through 72 hours for the bracket in its Transform RV manual, but another adhesive system may specify a different wait. Do not shorten the wait because the bracket feels firm at the edge.
Can I use extra tape if the supplied pad seems small?
Not unless the manufacturer authorizes that tape and arrangement. Extra layers change the fit and may create a flexible joint. A supplied pad that does not cover its designed footprint is a reason to request the correct replacement part.
Should the holder opening face up?
Waterpik says the large opening on its bracket faces up. Check the arrow or diagram for your model because cradle shapes differ. Dry-fit the handset before bonding so an orientation error is caught while it is still reversible.
What if the holder starts lifting at one edge?
Remove the handset and stop using the holder. Do not keep loading it or press the wet edge back temporarily. Follow the maker’s removal and replacement-strip procedure, then reassess the surface, preparation, hose pull, and cure conditions.
Where can I read about installing the rest of a handheld setup?
See the site’s guide to installing a handheld shower head. If the existing bracket is mechanically loose rather than adhesive-mounted, compare the holder types in the adjustable handheld holder guide.
Bottom line
Install an adhesive shower head holder only when the exact manual approves the wall, the handset dry-fits the cradle, the hose hangs without pulling, and you can protect the mount for the full cure period. If any one of those conditions fails, change the location or mounting method instead of trying to compensate with more adhesive.
Sources
- Waterpik, Transform RV Hand Held Shower Head instruction manual — opened October 27, 2026.
- 3M, Command Handheld Shower Head Holder — opened October 27, 2026.
- High Sierra Showerheads, Wall Holder Installation — opened October 27, 2026.