Fix a Shower Head That Leaks at the Connection
As an Amazon Associate we earn from qualifying purchases.
If a shower head leaking at connection is your problem, the sources point to two fixes: clean and re-wrap the arm threads, then tighten the joint carefully. This guide stays inside that job, the head and the arm, and it draws its steps from a New Jersey Department of Health cleaning guide and a U.S. Department of Energy installer job aid. It does not cover pipes, valves or the wall, because none of the sources describes repairs there.
Quick answer
- Turn the water on and confirm the drip is at the joint between the head and the arm.
- Remove the head, take off any old tape, clean the arm threads, and dry them completely.
- Re-wrap the threads with thread sealant tape two or three times clockwise, or as many times as the manufacturer recommends.
- Reinstall, tighten carefully with an adjustable wrench, then check again with the water on. If it still leaks, the sources do not describe the next step.
What the sources say causes the leak
The sources name two things that affect this joint: the threads and the tightness. The New Jersey guide says a leaking connection should be re-wrapped and tightened again. DOE’s job aid says the connection at the arm must not leak, and that buffer material can protect the fixture while you work. The table matches each symptom to the cause and the step the sources give.
| Where it leaks | Cause the sources name | What the sources say to do |
|---|---|---|
| Where the head meets the arm | Threads not sealed, or old tape or residue left on them (New Jersey guide; DOE job aid) | Remove old tape, clean the threads, re-wrap two or three times clockwise, and tighten carefully (New Jersey guide) |
| Still leaking after tightening | Connection not tight enough (New Jersey guide) | Tighten carefully with an adjustable wrench, then check again. Re-wrap if it still leaks (New Jersey guide) |
| The arm moves while you tighten | The arm is not sturdy (New Jersey guide) | Wrap the arm with a rag and hold it with pliers while you tighten (New Jersey guide) |
| Rust or mineral deposits on the arm threads | Rust and mineral deposits (New Jersey guide) | Clean them off with a cloth or toothbrush before you re-wrap (New Jersey guide) |
| Leak at a handheld bracket, hose or washer | not stated | Hand tighten the joint and do not overtighten, as the handheld Moen sheet describes. The sources do not describe a washer fix. |
| Leak continues after a re-wrap | not stated | not stated; the sources do not describe the next step |
The order matters. The New Jersey guide puts the re-wrap ahead of the second tightening, so do not keep turning the wrench on a joint whose threads have not been cleaned and wrapped. Clean and re-wrap first, tighten once, and then check the joint with the water on.
Step-by-step re-wrap and tighten
1. Confirm where the water leaks
Turn the water on and check for leaks. The New Jersey guide gives this check after reinstalling, and DOE’s job aid asks for no leaks at completion. Confirm that the drip is at the head and arm joint before you take anything apart. If the water is coming from a pipe, a valve or the wall, the sources do not cover that, and this guide does not either.
2. Remove the head
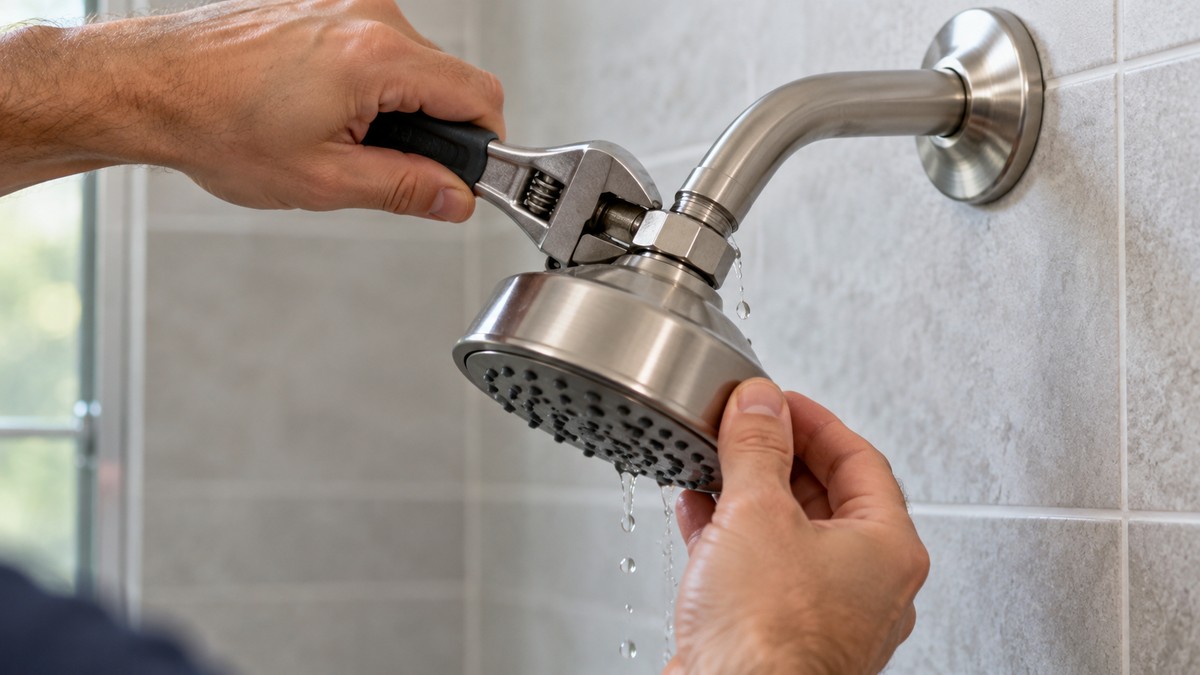
The New Jersey guide says to try removing the head by hand first, turning counterclockwise. If it will not turn, wrap the shower arm with a rag or cloth, hold it with pliers, and loosen the head with an adjustable wrench. You need the head off to clean and re-wrap the arm threads. DOE’s job aid adds the same caution about the arm, and it suggests buffer material if the head has no flat sides at the connection.
3. Clean the arm threads
The New Jersey guide says to remove any existing thread sealant tape from the arm. Clean off any visible rust or mineral deposits with a cloth or toothbrush. It also says to flush the plumbing with water while the head is off, so that the flow is not restricted by the head. After the flush, turn off the water and dry the threads completely. DOE’s job aid says the threads should be cleaned well to remove old residue, so take that step seriously when the joint has been leaking.
4. Re-wrap the threads
The New Jersey guide says to wrap thread seal tape in a clockwise direction two or three times around the threads of the shower arm, or as many times as the manufacturer recommends. Press the tape into the threads. DOE says to wrap new thread tape around the threads. On a handheld, check the tape line on the sheet for your model first, because the two Moen handheld sheets disagree on tape for their own projects.
5. Reinstall and tighten carefully
Screw the head back onto the arm by turning it clockwise. If the arm is not sturdy, hold it with a rag and pliers while you screw the head on, as the New Jersey guide describes. When the joint is in place, tighten carefully with an adjustable wrench. The handheld Moen sheet warns against overtightening, and DOE’s job aid says to make connections that do not leak while using buffer material to prevent damage to the fixture.
6. Check again with the water on
Turn the water on and check the joint. DOE’s checklist asks for no water leakage upon completion. If the joint still leaks after a re-wrap and careful tightening, the sources do not say what to do next, and the work stays within the head and arm, so do not take on repairs beyond them.
When the leak is at a handheld bracket or hose
The handheld Moen sheet covers the bracket, the hose and the washers, and it says to hand tighten each joint. It also says that thread seal tape is not recommended for its project, while the magnetic docking sheet puts tape on the arm threads. No washer repair steps appear in the sources. For installation help, missing parts or replacement parts, the handheld sheet says to contact Moen first.
If the handheld sits on a slide bar, the guide to handheld heads on a slide bar covers that setup. If a bar part needs replacing, see slide bar replacement parts. If the hose itself is leaking, the guide to replacement hose options is the next place to look.
What a finished joint should show
DOE’s installer checklist describes the result a job should reach. It asks that the equipment be installed in line with the manufacturer’s instructions and applicable building codes. It asks that the joint show no water leakage upon completion, that the fixture be undamaged, and that the fixture be fully functional. Those are the checks to run after a re-wrap. The leak standard in that checklist is no water leakage upon completion, so a joint that still drips has not met it.
Limits of this fix
This fix covers the head and the arm. Remove the head, clean and re-wrap the arm threads, reinstall, and tighten. None of the sources describes repairs to pipes, valves, the wall connection or the water supply, so this guide does not describe them either. If the mount itself is the issue, see shower bar mounts for a handheld head, which covers a different part of the setup.
The sources also do not say how long a re-wrap lasts, or whether a leak after re-wrapping points to a worn washer or a damaged part. Those questions stay open in this guide.
Mistakes to avoid
- Adding tape over old tape. The New Jersey guide says to remove any existing thread sealant tape first.
- Skipping the flush. The New Jersey guide says to flush the plumbing while the head is off.
- Forcing the arm. DOE says to take care not to loosen the shower arm, and the New Jersey guide says to hold a loose arm with a rag and pliers.
- Overtightening to stop a drip. The handheld Moen sheet warns against it, and the New Jersey guide says to tighten carefully.
- Skipping the leak check. DOE’s job aid and the New Jersey guide both call for one.
- Wrapping more than the instructions say. The New Jersey guide gives two or three wraps, or as many as the manufacturer recommends.
- Applying one tape rule to every joint. The Moen sheets give different instructions for different products.
How we chose
This guide relies on four published sources, each opened on 2026-10-21. We chose them because each one gives a leak instruction, a tightening rule, or a tape instruction for the head and arm joint. The New Jersey guide is the main source, because it covers the full order of steps for re-wrapping the arm threads. DOE’s job aid supplies the no-leak target and the buffer material note. The two Moen sheets are used only for the handheld joints and the overtightening warning. The Moen sheets were read for the handheld joints only. Their cleaning notes were not used, because this guide does not cover finishes. We did not rank products or pick a best fix.
What we could not verify: what the sources do not say
- Whether a leak after re-wrapping means a worn washer or a damaged part. Not stated.
- Washer or gasket replacement for any joint. The Moen sheets name washers but do not describe replacing them.
- Leaks at a pipe, a valve or inside the wall. Not covered by any source.
- How long a re-wrap of thread tape lasts. Not stated.
- Shower arm thread size. The sources do not state it. Confirm it on the arm or in the manual.
- A turn count or torque for tightening. Not stated.
- How to shut off the water for the job. The New Jersey guide says to turn the water off when drying the threads, but the sources do not say how.
- What to do if the leak continues after a re-wrap. Not stated for fixed heads.
Frequently asked questions
Why does a shower head leak where it joins the arm?
The sources name two causes at this joint: threads that are not sealed, or old tape and residue left on them, and a connection that is not tight enough. The New Jersey guide says to re-wrap the threads and tighten carefully when a connection leaks.
Do I have to remove the head to fix the leak?
To re-wrap the arm threads and clean them properly, yes. The New Jersey guide’s steps remove the head first, clean the arm threads, wrap them, and then reinstall. The sources do not describe a way to re-wrap with the head still on.
How tight should the connection be?
Tight enough to stop the leak, but not tighter. The New Jersey guide says to tighten carefully with an adjustable wrench, and the handheld Moen sheet warns against overtightening. The sources give no turn count or torque figure.
Can I add tape over the old tape?
No. The New Jersey guide says to remove any existing thread sealant tape before you wrap the arm threads again, and to clean off rust and mineral deposits first.
What if it still leaks after I re-wrap and tighten?
The New Jersey guide says to check again with the water on. If the leak continues, the sources do not describe the next step, and they do not cover repairs beyond the head and arm.
Does this fix work on a handheld shower?
The steps for the arm threads are the same in principle. For a handheld, the bracket, hose and washers are hand tightened according to the handheld Moen sheet, and the tape instruction differs by sheet. Check the tape line on the sheet for your model before you wrap anything.
Bottom line
Remove the head, clean and re-wrap the arm threads, reinstall, tighten carefully, and check with the water on. If the joint still leaks, stop at the head and the arm, because the sources do not describe repairs beyond them.
Sources
New Jersey Department of Health, Guidance for Removing and Cleaning a Shower Head. https://nj.gov/health/cd/documents/topics/legion/ShowerHead_Cleaning_Guidance.pdf (opened 2026-10-21)
U.S. Department of Energy, Install a Low-Flow Showerhead, Weatherization Installer Job Aid 24-1. https://www.energy.gov/sites/default/files/2024-07/24-1_install-low-flow-showerhead.pdf (opened 2026-10-21)
Moen, Handheld Shower Installation Guide INS10819. https://assets.moen.com/shared/docs/instruction-sheets/ins10819.pdf (opened 2026-10-21)
Moen, Magnetic Docking Handheld Shower Instruction Sheet INS10567A. https://assets.moen.com/shared/docs/instruction-sheets/ins10567a.pdf (opened 2026-10-21)