Plan a Shower Slide Bar Installation for Fiberglass Surround
As an Amazon Associate we earn from qualifying purchases.
Shower slide bar installation planning for a fiberglass surround must answer one question before a drill touches the wall: what will carry the fastener behind the thin finished panel? Fiberglass is the visible surface, not automatically the structural support. Identify the bar model, bracket spacing, wall thickness, cavity depth, stud or backing locations, approved anchors, and any concealed pipes or wires. If those facts are unavailable, pause the installation. Also keep the bar’s purpose clear: an ordinary handshower slide bar positions a spray wand; it is not a body-support grab bar.
Quick answer
- Read both the slide-bar instructions and the surround manufacturer’s drilling/warranty guidance.
- Confirm stud, backing, or an anchor explicitly suited to the measured wall and cavity before choosing hole size.
- Mark the real bracket centers with a level and verify hose reach before drilling.
- Stop if the surround flexes, the cavity is unknown, plumbing may cross the holes, or anyone expects the bar to provide fall support.
Separate the three layers of the decision
A reliable plan treats the installation as three different systems. First is the slide bar: its bracket centers, screws, posts, slider orientation, and hose connection. Second is the fiberglass surround: its thickness, shape, ribs, warranty, and allowed drilling method. Third is the hidden wall: studs, blocking, cavity space, supply pipes, valve parts, and electrical routes. One manual rarely describes all three.
Moen’s slide-bar guidance, for example, distinguishes a wood-stud fastening route from a hollow-wall toggle route. A separate Moen handshower guide distinguishes fiberglass from tile and says fiberglass anchors are not supplied; they must be added according to the anchor manufacturer’s instructions. That combination is a warning against copying a generic bit size or anchor from an unrelated wall.
Decide whether this bar is appropriate
Verify the bar is designed to mount on a wall, not only to replace a proprietary rail. Confirm that its handshower cradle fits the intended handle and that the hose can connect to the planned drop ell or shower-arm diverter. Moen describes those as two possible supply arrangements for its slide-bar system, but the chosen bar’s manual controls.
Next, read the safety label. Moen’s MT040 instructions state that the handshower slide bar is not to be used as a grab bar. A person must not pull, lean, or transfer weight on it. If the household needs support, specify a separately rated grab bar and a backing/fastening plan that meets its own instructions. Do not place an ordinary slide bar where its appearance invites unsafe use.
Inspect the fiberglass in strong side light. Look for existing cracks, bulges, repairs, delamination, or movement when lightly pressed. Check whether the proposed bracket lands on a molded ridge or curved transition. A flat bracket should sit on the surface for which it was designed; tightening it against a contour can stress the surround.
Map the hidden wall without guessing
Use available access from the room behind the shower, an existing service panel, construction documents, or a method approved by the surround maker to identify framing and utilities. A common electronic stud finder may not interpret an air gap and molded surround reliably, so do not treat one reading as proof. Never probe blindly near the shower valve or vertical supply route.
For each bracket, record four facts: finished-panel thickness, distance to the backing or wall behind it, material that will receive the fastener, and free cavity depth required by the proposed anchor. A hollow-wall toggle must have room to open and bear correctly. A wood screw must engage real framing or blocking rather than bridge empty space. If the bar maker requires a fastening option the actual wall cannot provide, choose another approved product or open and rebuild the wall through a professional—not a makeshift anchor.
Lay out the bar around the user and hose
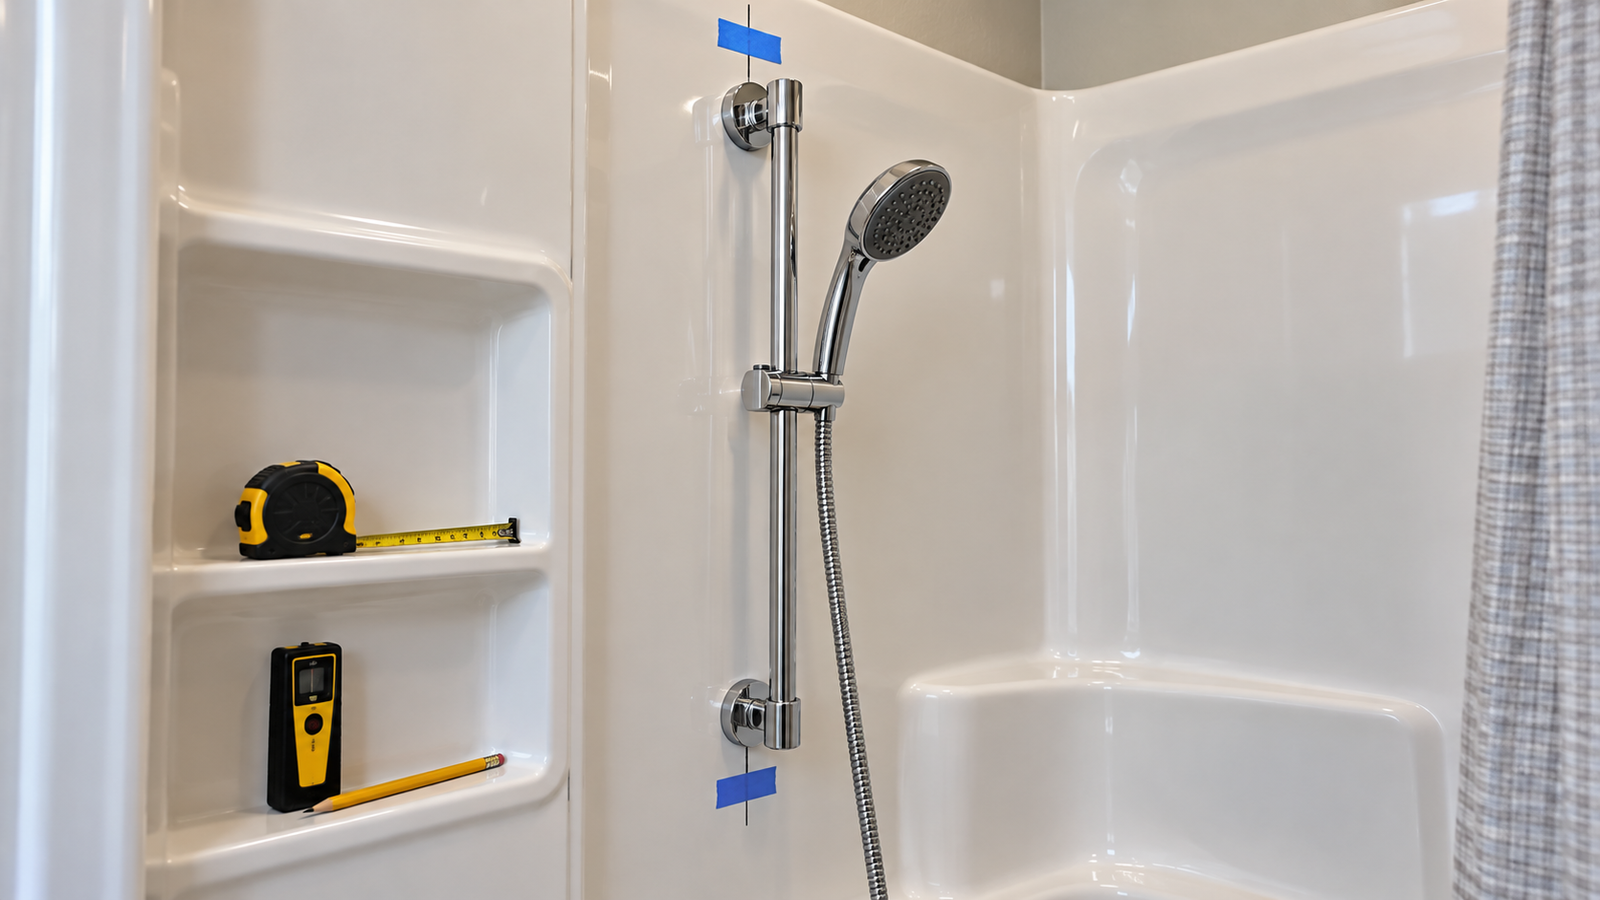
Temporarily assemble the bar and slider on a towel. Determine which end is up, how the slider releases, and how far the brackets extend beyond the nominal bar length. Hold the assembly against the wall with removable tape while another person checks the lowest and highest useful handheld positions.
Route a cord from the water outlet through the proposed hose loop to the handheld. At every slider position, the cord should stay relaxed and clear of controls, shelves, the drain, and the user’s feet. Check that the spray face can angle into the shower rather than over the curtain or door. A bar location that is easy to drill but leaves a stretched hose is not a workable layout.
Use a plumb calculation, not visual alignment
Let S be the distance between the actual top and bottom bracket centers specified for the assembled model. Let O be the horizontal difference between those centers when measured from a plumb reference. The layout target is:
Plumb offset O = |top-center position − bottom-center position| = 0.
This is a marking check, not a tolerance specification. The manufacturer’s template and level remain controlling. Do not substitute the bar’s advertised length for bracket-center distance; decorative posts and adjustable mounting systems can change the holes.
| Before drilling | Evidence needed | If unknown |
|---|---|---|
| Hole centers | Exact model template or measured assembled brackets | Do not infer from nominal bar length |
| Hole diameter | Bar, anchor, and surround instructions agree | Contact manufacturers |
| Fastener support | Verified stud/blocking or compatible anchor and cavity | Stop before drilling |
| Utility clearance | Known plumbing/electrical route | Use a qualified professional |
| Water sealing | Specified sealant or gasket and approved surface prep | Do not invent a sealant |
Prepare the surface and drilling setup
Clean and dry the area with a product allowed by the surround manufacturer. Use low-tack tape only if that manufacturer permits it. Transfer bracket centers once, then recheck the template in both orientations. Measure from fixed references and confirm the bar remains vertical when the slider and handshower are installed.
Gather eye protection, the exact bits named for the approved anchor and surface, a variable-speed drill if specified, a depth-control method, a level, tape measure, pencil, screwdrivers, and the manufacturer’s sealant if required. Keep a vacuum or collection method ready so debris does not enter the drain. Do not use hammer action on a fiberglass surface unless the exact manufacturer instructs it.
Sterling’s guide for one fiberglass shower product says to drill slowly at marked locations, select the bit by wall material, clean debris, and insert the specified hollow-wall anchors. Those principles are useful, but its hole size belongs to that product. Likewise, Moen manuals list different hole sizes for different slide-bar assemblies. There is no responsible universal diameter.
Follow a controlled fastening sequence
- Lock the approved layout. Verify reach, clearance, plumb, and bracket centers one final time.
- Confirm the stop plan. Know the maximum safe drilling depth and what lies behind each mark. If either is uncertain, hand the task to a professional.
- Drill the specified pilot or final hole slowly. Keep the bit square to the local surface. Stop if fibers lift, the panel cracks, or the bit meets an unexpected void or hard object.
- Clean and inspect every hole. A ragged or oversized opening is not fixed by more sealant. Ask the anchor or surround maker for the approved repair.
- Install the correct support. Use the wood-screw or hollow-wall route shown for the exact bar and verified wall. Allow toggles to open fully where specified.
- Apply water sealing as directed. Some systems use sealant or gaskets around penetrations. Use only compatible products and placement.
- Tighten evenly. Draw each bracket flat without crushing or visibly dimpling the fiberglass. Stop if the panel deforms.
- Assemble the rail and covers. Orient the slider correctly before closing decorative caps; verify its lock at several heights.
Connect the hose without transferring load
Moen’s installation guidance places a washer in the hexagonal hose end before it connects to the drop ell or diverter. Confirm the washer for the actual hose and start both hose connections by hand. Use an adjustable wrench only where the manual directs, while protecting the finish and preventing the wall outlet from turning.
Hang the handheld and move the slider from bottom to top. The hose should not pull the bar, pry the outlet, or fold sharply beneath the handle. If the bar shifts when the hose moves, stop and inspect the fastening system rather than tightening the decorative assembly harder.
Inspect for stability and water entry
Before running water, press the slider controls and move the handheld through its normal range without applying body weight. Watch both bracket edges. There should be no rocking, fiberglass whitening, cracking, or growing gap. Confirm decorative covers do not hide a loose screw.
Turn on the shower and inspect hose connections for droplets. Direct spray around—but not forcibly into—the mounted area as it would occur during normal use, then dry the surface and look for water emerging at bracket edges. Reinspect from any rear access panel. If water has entered the cavity, shut the shower down until the penetration is corrected.
After several uses, repeat the visual inspection. A bracket that begins to loosen, a crack radiating from a hole, or a surround that flexes around the mount requires prompt attention. Never compensate by hanging towels or accessories from the bar.
How we chose
The plan combines a current Moen slide-bar procedure, a Moen model manual with a clear non-grab-bar warning, a manufacturer handshower guide that specifically separates fiberglass anchoring from tile anchoring, and a Sterling fiberglass-wall drilling example. We retained model-specific dimensions inside their source context and built the workflow around verification rather than a generic anchor recipe.
What we could not verify
The sources do not identify the reader’s surround brand, laminate thickness, framing, cavity depth, concealed services, compatible sealant, or warranty conditions. They also do not establish one anchor or bit size for all fiberglass walls. Those missing facts must be resolved before drilling.
FAQ
Can a shower slide bar be screwed only into fiberglass?
Only if the exact bar and surround instructions approve a compatible fastening system for the measured wall and cavity. Fiberglass alone should not be assumed to provide adequate support. Verify backing or the complete anchor load path.
Can I use a slide bar as a grab bar?
Not unless it is specifically designed, rated, and installed as a safety grab bar. The cited Moen slide-bar manual says its bar is not for grab-bar use. Install a separately approved support product when body weight is involved.
What drill bit size works for a fiberglass surround?
There is no universal size. The required diameter comes from the exact bracket and anchor system, and the surround manufacturer must allow the method. Published manuals show model-specific differences, so copying a number can produce an oversized or unsafe hole.
Should I caulk behind the brackets?
Use the gasket or compatible sealant, location, and cure procedure specified by the bar or surround maker. Random caulk can obstruct an anchor, react with a surface, or conceal a loose mount without creating a reliable seal.
When should I stop and call a professional?
Stop when backing or cavity depth is unknown, utilities may cross a hole, the fiberglass is cracked or flexible, the chosen anchor is not approved, rear access is needed, or the installation is expected to support a person. A professional can open the non-shower side of the wall if necessary and add proper backing without gambling on the surround.
Bottom line
Do not drill until the exact bar, exact surround, and hidden support agree on the same fastening plan; if any one of those is unknown, the safe next step is investigation, not a larger anchor.
If body support is the real need, start with the guide to ADA-oriented shower slide bars and support distinctions. Renters or owners who cannot verify a safe drilling path can review drill-less slide-bar fit considerations. After mounting, the exposed plumbing portion is covered in the shower-hose replacement guide.
Sources
- Moen — Installing a Handshower on a Slidebar (opened October 27, 2026)
- Moen — MT040 Handshower Slidebar Assembly Instructions (opened October 27, 2026)
- Moen — Handshower Set-Up Guide (opened October 27, 2026)
- Sterling — Fiberglass Shower-Wall Installation Guide (opened October 27, 2026)