How to Use a Shower Head Adapter
As an Amazon Associate we earn from qualifying purchases.
In manufacturer sheets, a shower head adapter is the part that joins the shower head to the arm, or a connector that joins the head to the hose. This guide follows the steps in those sheets: flush the arm, seal the threads, connect the part, tighten each joint the way the sheet says, then check for leaks. The sheets do not all use the same tightening method, so the differences are shown in a table. Your model’s manual decides the final steps.
Quick answer
- Flush the arm before the head goes on. Kallista’s shower arm sheet unthreads its adapter from the arm, threads it into the head, then threads the head onto the arm.
- Seal the threads with the material your sheet names: thread sealant, sealant tape or plumber tape. Delta’s hand shower sheet rules out pipe dope.
- Tighten by the sheet. Delta’s IN2ITION sheet says hose connections can be made by hand. Kallista’s handshower sheet calls for an adjustable wrench at the handshower-to-hose joint. The sources disagree.
- Turn the water on and check for leaks. If a joint leaks, re-wrap or re-tighten in small steps.
What the adapter connects
Manufacturers use the word for more than one joint, so start by reading which joint your sheet covers. The sources cover three joints.
Arm to head
Kallista’s shower arm sheet (1226929-2-D) describes a shower arm adapter with a ball joint. The adapter is unthreaded from the arm after the flush step, threaded into the showerhead, and then the showerhead is threaded onto the arm. The sheet’s wall pipe step is separate and sits at the finished wall.
Kohler’s showerhead sheet (113280-2) names no separate part at the head-to-arm joint. Its steps apply sealant tape to the shower arm and thread the showerhead onto the arm. Delta’s IN2ITION sheet (72161 Rev. I) says to check that a gasket is in the showerhead, then hand-tighten the showerhead onto the existing shower arm.
Head to hose
Kallista’s handshower sheet (1188577-2-G) covers the hose end. A washer goes into the threads of the handshower connector, and the handshower threads into the hose. Delta’s hand shower sheet (72634 Rev. B) describes a hose nut that takes a gasket. On some wall mounts, the hose first attaches to a swivel device, and the handshower attaches to the swivel. Delta’s hand shower sheet also says some of its hoses are gasketless.
Wall-side adapters are a different job
Kallista’s shower arm sheet 1211608-2-A starts with an adapter at the finished wall. The sheet has you install a 1/2 NPT nipple, with the end 1/2″ (13 mm) to 5/8″ (16 mm) from the finished wall, apply sealant tape to the nipple, and thread the adapter onto the nipple. That part belongs to the wall plumbing, so this guide does not cover it.
Prepare the arm and seal the threads
Shut off the water supply before you start. Kallista’s arm sheet and handshower sheet both say to shut off the water supply, and Kohler’s showerhead sheet says to shut off the main water supply.
Check the arm type first
Delta’s hand shower sheet (72634 Rev. B) warns that a shower arm with a ball on the end will not work with its unit and must be replaced with a standard shower arm. The sources do not say whether a ball-ended arm works with any other adapter, so check the arm type against your part’s sheet before you buy.
Remove the old head and clean the threads
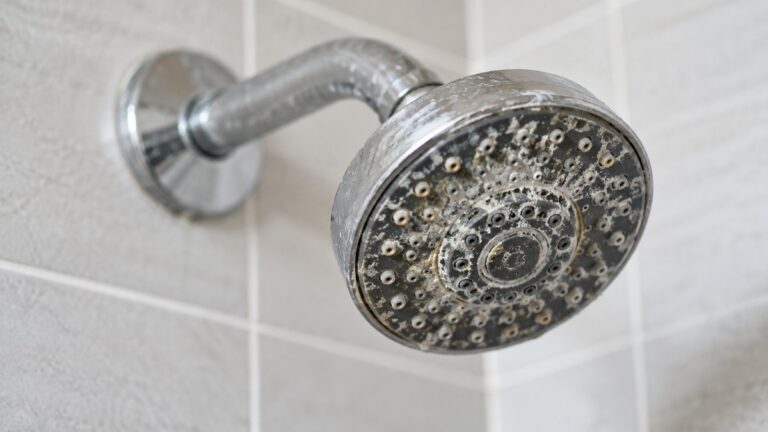
Delta’s hand shower sheet says the goal is to unscrew the existing head without unscrewing or rotating the arm it is attached to. Once the head is off, clean the arm threads. The DOE installer job aid says “Clean threads of shower arm well,” and Delta’s sheet adds that a cloth or wire brush can be used if needed.
Flush before the head goes on
Kallista’s arm sheet says to run hot and cold water through the shower arm to flush out dirt and debris before the adapter goes back on. Kohler’s showerhead sheet says to flush the system with the showerhead off. Kohler’s Bravura sheet (113442-2) asks for one minute of flushing through the arm before the head is threaded on. The sources do not give a flush time for any other part.
Seal the threads
The sheets name different materials. The table gives the sealant each sheet names and where it goes.
| Sheet | Where the sheet puts sealant | Material the sheet names |
|---|---|---|
| Kallista shower arm, 1226929-2-D | The shower arm adapter, before it goes into the head | Thread sealant |
| Kohler showerhead, 113280-2 | The shower arm threads, before the head goes on | Thread sealant tape |
| Kohler Bravura, 113442-2 | All threaded connections | Thread sealant |
| Delta hand shower, 72634 Rev. B | The shower arm threads, wrapped clockwise | Plumber tape, and “NEVER USE PIPE DOPE.” |
| DOE job aid 24-1 (July 2024) | All connections | Thread tape |
| New Jersey Department of Health guidance | The shower arm threads, two or three wraps clockwise | Thread seal tape |
Delta’s hand shower sheet is the only one of these that rules out a material, pipe dope. The others name a tape or sealant without ruling out other types. If your sheet names none, the sources here do not tell you which one to use.
Connect the adapter, the head and the hose
Adapter between arm and head (Kallista 1226929-2-D)
After the arm is installed and flushed, Kallista’s sheet has you unthread the adapter from the arm with a 9 mm hex wrench. The sheet then gives four steps to finish the installation.
- Apply thread sealant to the shower arm adapter.
- Thread the adapter tightly into the showerhead while securing the ball joint with a wrench. The sheet adds a caution: be careful not to scratch the finish with the wrench.
- Thread the showerhead tightly into the shower arm.
- Check for proper operation.
The sheet also says to use a clean strap wrench to securely tighten the shower arm onto the wall pipe. The strap wrench goes on the arm at that step, not on the head.
Head onto the arm with no adapter (Kohler 113280-2, Delta 72161 Rev. I)
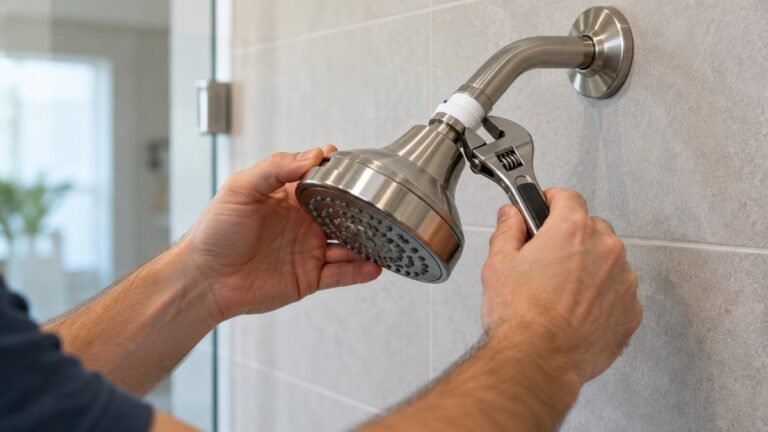
Kohler’s showerhead sheet says to apply thread sealant tape to the shower arm and thread the showerhead to the shower arm. Delta’s IN2ITION sheet says to verify a gasket is in the showerhead, then hand-tighten the showerhead onto the existing shower arm. The sheets differ on the tightening step, which is covered below. If the sheet for your model names no part at this joint, the sources here do not tell you whether a separate adapter would fit.
Handshower to hose (Kallista 1188577-2-G, Delta 72161 Rev. I, Delta 72634 Rev. B)
Kallista’s handshower sheet has you insert a washer into the threads of the handshower connector and thread the handshower into the hose. Delta’s IN2ITION sheet says to place the hose gaskets into the hose nuts on each end of the hose, connect one end to the showerhead and the other end to the handshower, and make the connections by hand. Delta’s hand shower sheet says to insert a gasket if one is provided, carefully align the threads, and hand-tighten. On a wall mount with a swivel, the sheet has you attach the hose to the swivel first, then attach the handshower to the swivel.
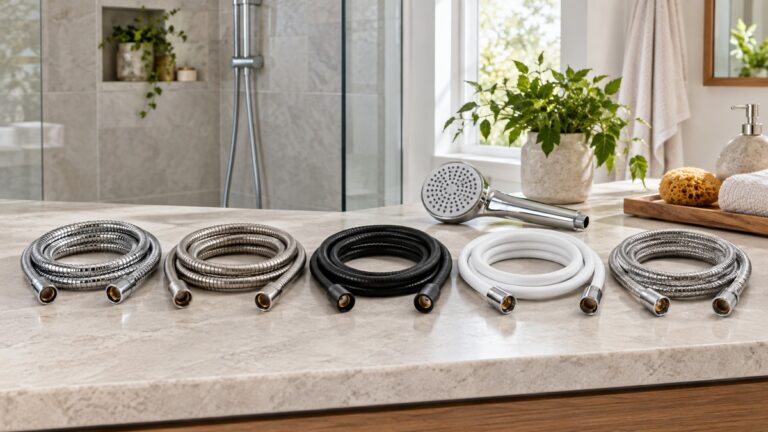
If the hose itself needs replacing, see the replacement hose options for Waterpik heads. If a washer or bracket part is missing from a slide bar setup, the replacement parts for a shower slide bar guide is the place to check.
Vacuum breaker and hose orientation
Delta’s hand shower sheet says a shower may come with a vacuum breaker attached to one end of the hose. That end must be attached to the water outlet. The sheet adds that if the breaker is installed backward, it will not function. It also says a vacuum breaker is a device that is required by certain code authorities, and warns not to try to tighten it, because that can damage the mechanism.
Kallista’s handshower sheet says plumbing codes may require a vacuum breaker to be installed in-line to handshowers. Local plumbing code decides whether you need one. The sources do not give the rule for any area.
Tighten and check for leaks
The sheets do not agree on how tight each joint should be. The table gives the instruction each sheet states for each joint. None of the sheets gives a torque figure.
| Joint | Sheet | Tightening instruction the sheet states |
|---|---|---|
| Adapter into the showerhead | Kallista 1226929-2-D | Thread tightly while securing the ball joint with a wrench |
| Showerhead onto the shower arm | Kallista 1226929-2-D | Thread tightly |
| Showerhead onto the shower arm | Delta 72161 Rev. I | Hand tighten |
| Shower arm onto the wall pipe | Kohler 113280-2 | Carefully tighten with a clean strap wrench |
| Handshower onto the hose | Kallista 1188577-2-G | Tighten with an adjustable wrench |
| Hose connections | Delta 72161 Rev. I | Connections should be able to be made by hand tightening |
| Hose nut onto the water outlet | Delta 72634 Rev. B | Tighten firmly and clockwise; the sheet says not to use a wrench |
| Re-tightening after a leak | New Jersey Department of Health guidance | Re-wrap with sealant tape, then tighten again with an adjustable wrench |
| Re-tightening after a leak | Delta 72634 Rev. B | Re-tighten in small steps, being careful not to strip the threads |
The handshower-to-hose joint is where the sources differ most. Delta’s sheets say hand-tight, and Kallista’s says an adjustable wrench. Follow the sheet that came with your handshower, since the two makers’ sheets say different things.
Common mistakes to avoid
- Over-tightening. Delta’s hand shower sheet warns against over-tightening, because the threads can strip.
- Scratching the finish. Kallista’s arm sheet warns against scratching the finish with the wrench used to hold the ball joint.
- Skipping the flush. Kallista’s arm sheet, Kohler’s showerhead sheet and Kohler’s Bravura sheet all include a flush step before the head goes on.
- Installing the vacuum breaker backward. Delta’s hand shower sheet says a backward breaker will not function.
- Using pipe dope on a Delta arm. Delta’s hand shower sheet says never use pipe dope.
Check for leaks
Turn the water on slowly, as Delta’s hand shower sheet says for its cold water check, and look at every joint you touched. Kallista’s handshower sheet says to check for leaks and smooth operation. The New Jersey guidance says to turn the water on and check for leaks. The DOE job aid says to ensure that connections will not leak, and its checklist ends with “There is no water leakage upon completion.”
If a joint leaks, the New Jersey guidance says to re-wrap the threads with sealant tape and tighten again with an adjustable wrench. Delta’s hand shower sheet says to re-tighten in small steps, being careful not to over-tighten and strip the threads. The sources do not say what to do if a leak continues after that.
For hose reach, see the hand-held shower head extension hose guide. For mounting a handshower on a bar, see the hand-held shower head on a slide bar guide.
How we chose
The manufacturer sheets had to cover a part between the arm and the head, or between the head and a hose, with installation steps and a stated sealing or tightening instruction. We opened ten pages with curl on 2026-10-22 and checked each quoted sentence against the saved page text. Nine are cited. One Moen sheet was left out because it describes a wall-mounted adapter that threads into the wall. One Kallista sheet, 1211608-2-A, is cited only to mark that wall-side boundary.
The manufacturer sheets come from three brands: Kallista, Kohler and Delta. The other two pages are from the U.S. Department of Energy and the New Jersey Department of Health, and are used only for thread tape and leak checks at the arm. The printed dates on the manufacturer sheets run from 1997 to 2025, and the Delta hand shower sheet is Rev. B dated 3/9/12. Compare each sheet with your own product before you follow it.
What we could not verify: what the sources do not say
- No opened source gives the thread size of the shower head, the shower arm or an adapter. Kallista’s arm sheet and Kohler’s showerhead sheet call for a 1/2 NPT pipe or nipple at the wall, not at the head. Check the thread on your head or arm, or in the manual.
- No source gives a torque figure for any joint. The sheets use words such as “tightly,” “hand tighten,” “adjustable wrench” and “strap wrench,” with no number.
- No source gives the length of an adapter, a connector or a hose.
- No source says whether an adapter from one brand fits a head from another brand. Kallista’s handshower sheet says its low-flow products are designed for use with compatible Kallista valves. It does not address adapters from other makers.
- No source gives soak limits or cleaning rules for brass, nickel, gold or matte black finishes. Delta’s IN2ITION sheet gives one general rule: the finish “can be damaged by harsh abrasives or polish.” It does not list finish-specific limits.
- No source says whether an adapter changes the flow rate or spray pattern of a head.
- Each sheet covers only the model numbers printed on it. A model that is not listed may differ from the steps shown.
Frequently asked questions
Do all shower heads need an adapter?
No. The sources show two layouts. Kallista’s arm sheet (1226929-2-D) uses a shower arm adapter with a ball joint. Kohler’s showerhead sheet (113280-2) and Delta’s IN2ITION sheet (72161 Rev. I) join the head to the arm directly, with sealant tape or a gasket. Check which layout your model uses before you buy a part.
What should go on the threads?
It depends on the sheet. Kallista’s arm sheet calls for thread sealant on the adapter, and Kohler’s showerhead sheet calls for sealant tape on the arm. The DOE job aid says thread tape at all connections. The New Jersey guidance says two or three clockwise wraps of thread seal tape. Delta’s hand shower sheet calls for plumber tape with no pipe dope. Use the material your model’s sheet names.
Should I tighten by hand or with a wrench?
Follow your sheet, because the sources differ. Delta’s IN2ITION sheet says its hose connections should be able to be made by hand. Kallista’s handshower sheet uses an adjustable wrench at the handshower-to-hose joint. Kallista’s arm sheet uses a wrench on the ball joint and a clean strap wrench on the arm. None of the sheets gives a torque value.
Can a wrench scratch the finish?
Kallista’s arm sheet says to be careful not to scratch the finish with the wrench. Delta’s IN2ITION sheet says the finish can be damaged by harsh abrasives or polish, and recommends a damp cloth. The sources give no soak limits or finish-specific cleaning for other finishes.
What if a joint leaks after I connect it?
Turn the water on and check every joint you touched. The New Jersey guidance says to re-wrap the threads with sealant tape and tighten again with an adjustable wrench. Delta’s hand shower sheet says to re-tighten in small steps, without stripping the threads.
Does my hose need a vacuum breaker?
Some hoses come with a vacuum breaker attached at one end. Delta’s hand shower sheet says that end goes to the water outlet, and installed backward it will not function. Kallista’s handshower sheet says plumbing codes may require one in-line to handshowers. The sources do not give the code rule for any area.
Bottom line
Use the sheet for your exact model. If it names an adapter at the joint you are changing, follow its steps, flush, seal, tighten the way it says and check for leaks. If it names no adapter there, check with the maker before you add one.
Sources
- Kallista, Shower Arm installation instructions, document 1226929-2-D: https://techcomm.kohler.com/techcomm/pdf/1226929-2.pdf (opened 2026-10-22)
- Kallista, Handshower, Hose and Handshower Accessories installation instructions, document 1188577-2-G: https://techcomm.kohler.com/techcomm/pdf/1188577-2.pdf (opened 2026-10-22)
- Kallista, Shower Arm installation instructions, document 1211608-2-A: https://resources.kohler.com/interiors/kallista/pdf/1211608-2.pdf (opened 2026-10-22)
- Kohler, Showerhead installation guide, document 113280-2-AB: https://resources.kohler.com/onlinecatalog/pdf/113280_2.pdf (opened 2026-10-22)
- Kohler, Bravura Showerhead and Arm installation instructions, document 113442-2-AA: https://techcomm.kohler.com/techcomm/pdf/113442-2.pdf (opened 2026-10-22)
- Delta, Installation instructions for IN2ITION Showerheads, 72161 Rev. I: https://media.deltafaucet.com/MandI/72161%20Rev%20I.pdf (opened 2026-10-22)
- Delta, Hand Shower Units Do-It-Yourself Instructions, 72634 Rev. B: https://media.deltafaucet.com/MandI/72634RevB.pdf (opened 2026-10-22)
- U.S. Department of Energy, Install a Low-Flow Showerhead, Weatherization Installer Job Aid 24-1 (July 2024): https://www.energy.gov/sites/default/files/2024-07/24-1_install-low-flow-showerhead.pdf (opened 2026-10-22)
- New Jersey Department of Health, Guidance for Removing and Cleaning a Shower Head: https://nj.gov/health/cd/documents/topics/legion/ShowerHead_Cleaning_Guidance.pdf (opened 2026-10-22)