how-to-clean-rain-shower-head-nozzles
As an Amazon Associate we earn from qualifying purchases.
If water leaves your rain shower head in thin, uneven streams, the small nozzle holes are often partly blocked by mineral deposits. Learning how to clean rain shower head nozzles is usually a matter of rubbing the face, soaking it in a vinegar solution, and clearing the holes one by one. This guide walks through those steps in order, explains when each one applies, and covers how to put the head back on without leaks. The steps come from manufacturer care pages and a state health department guide. Where those pages do not give a figure or a method, this post says so.
Quick answer
- Start by rubbing the nozzles with a finger or a soft brush while the water runs. Kohler’s care guide for its Real Rain panel gives this as the first step.
- If flow is still reduced, Kohler says to fill the nozzles with a 50/50 mix of white vinegar and water and let it soak for 20 to 30 minutes, then rinse.
- For a head you can remove, the New Jersey Department of Health guide says to soak it in a bowl of distilled white vinegar overnight, then clear any blocked holes with a needle or straightened paper clip.
- Do not use bleach, chlorine, ammonia or abrasive cleaners. Moen’s Nebia FAQ warns that these may damage the finish.
How we chose
The steps in this post come from four pages we opened on 2026-10-27: Kohler’s care page for its Real Rain panel, Moen’s FAQ for its Nebia shower system, a Moen instruction sheet covering a fixed and combination showerhead, and the New Jersey Department of Health guide on removing and cleaning a shower head. We kept a step only when one of those pages describes it in its own words. We left out methods that appeared only in general cleaning articles, because none of those articles was a manufacturer or public agency page.
We did not rank the methods. Each one fits a different situation. A built-in panel with visible deposits calls for a different approach than a head that screws onto a shower arm. Where two of the pages give different figures, this post shows both and explains why they differ, instead of picking one.
The retailer listings in the product file were read on 2026-10-23. They are cited only for the counts and pick sizes they state. The file holds 11 listings. Ten are sets of cleaning brushes and picks. One is a 5.1-inch rainfall shower head with 63 jets, which is a shower head rather than a cleaning tool, so it does not appear in the table below. This post contains no prices or ratings.
What you need
The New Jersey guide lists these supplies: an adjustable wrench, needle nose pliers, a bowl, distilled white vinegar, thread sealant tape, a cloth, and a toothbrush. You will not need all of them for every method. A finger, a soft brush and a bottle of white vinegar cover the first two steps below. The Kohler page does not list supplies, so the list above comes from the state guide.
The New Jersey guide says to turn off the water and dry the threads completely before you work on the connection and wrap them with tape.
Step-by-step: how to clean rain shower head nozzles
Step 1: Check the head type and the manufacturer’s instructions
Some rain heads are built into a flat panel with a metal trim ring. Others are round heads that screw onto a shower arm. The method changes with the design. Kohler’s guide covers its Real Rain panel and warns about the trim: “Do not allow cleaners to contact the metal trim components.” It notes that permanent staining or corrosion may occur. If your head has a metal trim ring, keep cleaning liquid away from it.
If you have a Moen head, check whether it is a Nebia or a different model. The Nebia FAQ and the Moen instruction sheet we opened cover different products, so one should not be applied to the other without checking the manual for your model.
Step 2: Rub the nozzles while the water runs
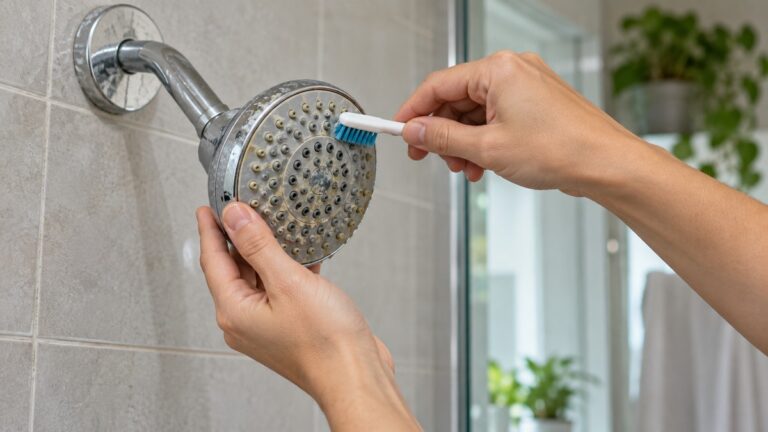
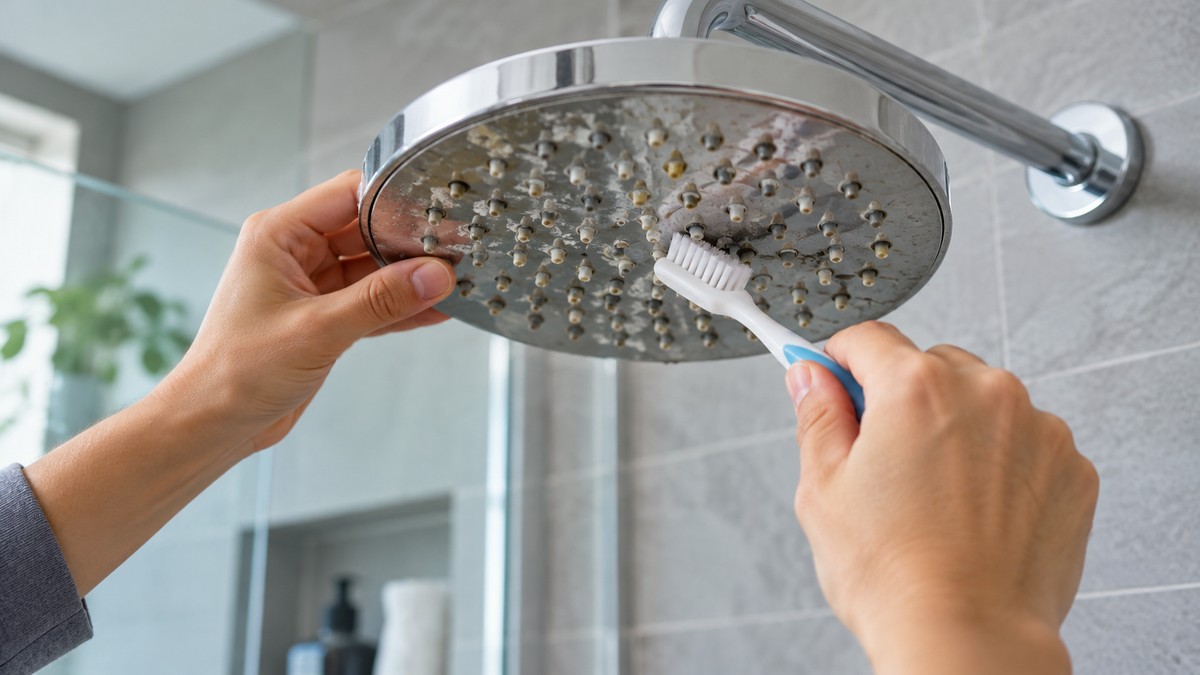
Kohler’s guide describes the first check for a built-in panel. If the flow is reduced, or you can see debris or deposits on the nozzles, the panel needs cleaning. The first step is to “Rub the nozzles clean with a finger or soft brush.” Turn the water on and rub each nozzle with a fingertip, moving across the face of the head. A soft brush works where a fingertip cannot reach.
Kohler also describes a second rub for stubborn spots. The guide says, “For stubborn nozzles, rub with a finger.” Use gentle pressure. The guide does not describe any tool that should be used for this step, so a fingertip or soft brush is the method the page supports.
Step 3: Soak the built-in panel in a vinegar solution
If rubbing does not clear the flow, Kohler’s guide uses a vinegar soak for the panel. The first step is to “Make a solution of 50% water and 50% white vinegar.” Then “Pour the solution into the rain panel until the nozzles are filled.” Next, “Let the solution soak for 20-30 minutes.” After that, the guide says to rub stubborn nozzles with a finger again.
When the soak is done, “Rinse the rain panel off thoroughly.”
Moen’s Nebia FAQ also lists a vinegar option: “You can also use 50% distilled white vinegar and water solution.” The FAQ does not give a soak time, so the 20 to 30 minute figure above comes only from the Kohler page. Do not treat it as a figure for Moen heads.
Step 4: Remove the head for a deeper cleaning
If the head screws onto a shower arm and the holes are still blocked, the New Jersey guide describes taking the head off. Its first instruction is “First try removing the shower head by hand.” The guide continues: “Grip the shower head or the connecting nut, depending on the design of the shower head, and turn counterclockwise to unscrew.”
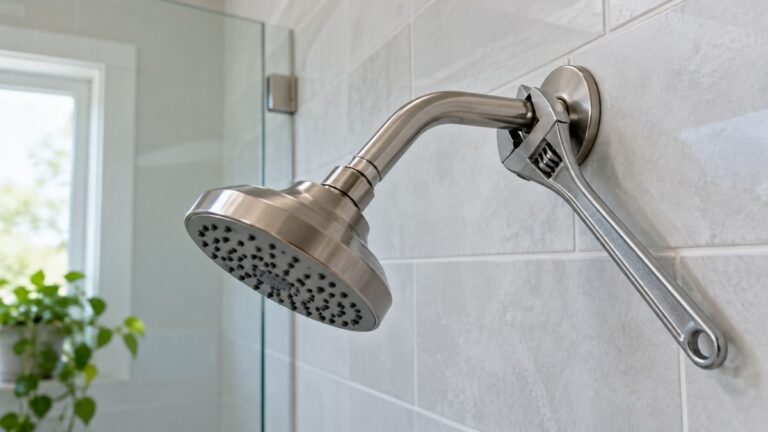
If the head will not turn by hand, the guide says to protect the arm and use tools. In its words, “wrap your shower arm with a rag or cloth and use pliers to hold it in place,” then loosen the head with an adjustable wrench. Once the head is loose, unscrew it the rest of the way by hand.
The guide also says to clean the threads on the arm. “Clean off any visible rust or mineral deposits using a cloth or toothbrush.” Take this opportunity to flush the pipe. The guide says, “you should use this opportunity to flush the plumbing with water” while the flow is not restricted by the head. Turn the water off again and dry the threads before you continue.
Step 5: Soak the removed head overnight
For a removed head, the New Jersey guide gives a different soak. It says to “fully submerge the shower head in a bowl of distilled white vinegar and let it soak overnight.” The guide also says the shower head may have a filter screen inside. “Shower heads often have a filter screen inside that can be removed with a pair of needle nose pliers.” The guide describes cleaning that screen as well, as covered below.
The two soak times differ because the two guides cover different parts. The Kohler figure of 20 to 30 minutes applies to a built-in panel that is filled in place. The New Jersey figure of overnight applies to a whole head that is removed and placed in a bowl. Neither guide says the other time is wrong. The sources we opened do not say which time works best for a given head, so the choice is yours within the limits each guide describes.
After the soak, the guide says the filter screen should be rinsed with water, or cleaned with a toothbrush and all-purpose cleaner or dish soap for stubborn, sticky debris. Rinse the screen fully before you put it back.
Step 6: Clear the blocked holes one at a time
Soaking loosens deposits, but some holes may still be blocked. The New Jersey guide describes the next step: “Use a needle or straightened paper clip to unblock any holes in the showerhead that are still clogged by mineral deposits.” Work through the holes one at a time. Push the tip gently into each hole and move it back and forth until the hole is clear. Do not force a pin into a hole that will not move.
The guide describes these deposits as the reason for the problem. It explains that “naturally occurring minerals can build up and block the nozzles (holes) through which water passes.” That is why the soak and the clearing step both matter. A soak softens the deposits, and a pin clears the holes that remain.
If your rain head is a Nebia, the Moen FAQ describes a different filter. It says the Nebia has a “built-in multi-layer filter at the inlet designed to catch sediment and solid buildups.” The FAQ says this filter can be reached by pushing the button on top of the bracket to remove the unit from the wall. That filter is specific to the Nebia. Other rain heads may not have one, so check the manual for your model before you look for it.
Step 7: Rinse and dry the face
After any soak, rinse the head with clean water until no cleaning liquid remains. For routine cleaning, Moen’s Nebia FAQ recommends a gentler approach: “We recommend using a mild soap, rinsing with warm water and drying with a clean, soft cloth.” Kohler also says to rinse the panel thoroughly after a vinegar soak, as quoted in step 3.
Moen’s instruction sheet for a fixed and combination showerhead covers a different part of the same routine. It describes soaking stainless steel massage rollers in a vinegar and water solution, and it warns against cleaners containing chlorine or bleach. That sheet is for a different head design, so it supports the general warning against bleach, not a soak time for a rain panel.
Step 8: Put the head back on without leaks
Before you reattach the head, the New Jersey guide says to clean the threads and remove any old tape. “Remove any existing thread sealant tape” from the threaded end of the arm. Then “Wrap thread seal tape in a clockwise direction two or three times around the threads of the shower arm (or as many times as recommended by the manufacturer).” Finally, “Press the tape into the threads.”
Screw the head back on by hand first. The guide says, “Screw on the clean or new shower head by turning clockwise.” If the arm is not sturdy, wrap it with a rag and hold it with pliers while you tighten the head. Then “Turn the water on and check for leaks.” Look closely at the joint and the face of the head.
If the joint leaks, the guide gives a fix: “If the connection does leak, re-wrap the threads with thread sealant tape and carefully tighten again with an adjustable wrench.”
Step 9: Check the spray pattern
Run the water for a short time and look at the spray. The sources we opened do not describe a specific test for spray pattern. What you can check is whether each nozzle now produces a steady stream and whether the joint stays dry. If a few holes still look blocked, return to step 6 and clear them with a pin. If the joint leaks again, check the tape and tightness before you try anything else.
Related reading on this site
If the head is leaking at the arm rather than the face, our post on how to stop a rain shower head from dripping covers that problem. For a head that is not clearing after cleaning, how to clear clogged shower head nozzles goes deeper into the holes. Our guide to cleaning a shower head with vinegar covers soaks for other head designs. If you are about to reinstall a rain head, how to install a rain shower head covers the fitting steps. For the mineral side of the problem, why shower heads get mineral buildup explains where the deposits come from. If you are not sure whether deposits are the cause, how to tell if your water is hard is a useful next step.
Cleaning tools listed on Amazon
Some readers want a set of small tools for the holes. The product file holds ten listings for nozzle cleaning sets. The table below shows only what each listing states about its contents and pick sizes. The listings do not say which set clears a particular head best, and this post does not rank them.
| Listing (ASIN) | What the listing states |
|---|---|
| B0H1MDY9YQ | 20 cleaning brushes, each with its own protective cap; listing says suitable for holes larger than 0.02 inches (0.5 mm) |
| B0F2YRV4TZ | 2 picks at 0.078 and 0.098 inch, plus 10 stainless steel unclogging pins at 0.015 to 0.05 inch |
| B0H32KRWLB | 30 pieces: 20 fine brushes and 10 picks sized 0.015 to 0.05 inch |
| B0F7RGKHYG | 50 tools: 40 crevice brushes and 10 shower head cleaner picks |
| B0F5GFBQLK | 80 pieces: 10 stainless steel needle picks and 70 brushes, each in its own cap |
| B0GY3W3JTJ | 30 pieces: 2 picks at 0.078 and 0.098 inch and 10 pins at 0.015 to 0.05 inch |
| B0H1G5SM1C | 40 nylon brushes and 10 stainless steel needles in a storage case |
| B0GTPKNB23 | 40-piece set: 30 brushes at 0.078 and 0.098 inch and 10 pins at 0.015 to 0.05 inch, in a hard storage case |
| B0H44LF9W6 | 90 pieces: 70 cleaning brushes, 10 stainless steel needle picks and 10 nozzle detail brushes |
| B0GXF7Q23H | 30 pieces: 10 stainless steel drain needles (4.52 inches long) and 2.64-inch nylon brushes |
Three of these listings are linked below. Each link opens the listing on Amazon.
- View on Amazon: 20 cleaning brushes with the 0.02 inch hole size stated in the listing.
- View on Amazon: a 50-tool set with 40 crevice brushes and 10 picks.
- View on Amazon: a 30-piece set with 10 drain needles and nylon brushes.
The New Jersey guide describes a needle or straightened paper clip for the same job. A pick set is one way to get a needle-type tool, so you do not have to use a paper clip if you prefer a kit. Whichever tool you use, keep the tip gentle and do not force it into a hole.
What we could not verify: what the sources do not say
The sources we opened leave several questions open. We list them here so you know where the guidance stops.
- No source we opened gives a set cleaning schedule. Kohler describes cleaning when flow drops or deposits show, and the New Jersey guide describes routine cleaning without a number of weeks or months.
- We could not open a Delta care page. The Delta page returned a bot-check screen instead of its content. We could not open a Hansgrohe care page either, because the server returned a 403 error. The Speakman care guide opened only as a catalog viewer with no readable cleaning text. None of these pages is used in this post.
- The sources do not say which finishes vinegar is safe for. Kohler’s only finish-related warning concerns metal trim. Moen warns against several harsh chemicals, but its FAQ does not list which finishes vinegar can damage.
- No source gives a flow rate, a gallons-per-minute figure, or a before and after measure for these nozzles. This post does not state one.
- The Kohler soak time of 20 to 30 minutes applies to its built-in panel. The sources do not say whether the same time works for a screw-on head, and the New Jersey guide gives overnight for a removed head instead.
- The Moen instruction sheet covers a fixed and combination showerhead. Its vinegar soak is for stainless steel massage rollers, not for a rain panel, and the sheet does not give a soak time for those rollers.
- The sources do not describe how to tell a clogged nozzle from a problem with the water supply. If the flow is weak at every head in the home, the cause may lie outside the head itself.
FAQ
How often should I clean rain shower head nozzles?
The sources we opened do not give a set schedule. Kohler says to clean the panel when flow is reduced or when deposits are visible on the nozzles. The New Jersey guide describes routine cleaning as part of keeping the head working, but it does not give an interval.
Can I use vinegar on a rain shower head?
Kohler and Moen both describe a 50/50 mix of white vinegar and water. Kohler uses it for a built-in panel, and Moen’s Nebia FAQ lists it as an option. The sources do not say whether vinegar is safe for every finish, so check the manual for your model before you soak a head with a special finish.
How long should I soak the nozzles?
Kohler gives 20 to 30 minutes for a built-in panel that is filled in place. The New Jersey guide gives overnight for a whole head removed and placed in a bowl of distilled white vinegar. The two figures apply to different parts, so follow the guide that matches your head.
Do I have to remove the shower head to clean it?
Not always. Kohler’s first step is to rub the nozzles while the water runs, and its panel soak is done in place. The New Jersey guide describes removing the head for a full cleaning. The sources do not set a rule for when removal is needed, so you can start with the first steps and remove the head only if the holes stay blocked.
Can I use bleach to clean the nozzles?
No. Moen’s Nebia FAQ says never to use cleaners containing abrasives, ammonia, chlorine, bleach or other harsh chemicals, because they may damage the finish. Kohler also warns against letting cleaners touch the metal trim. Stick to mild soap, warm water and white vinegar.
What if the head leaks after I put it back on?
The New Jersey guide says to re-wrap the threads with thread sealant tape and carefully tighten the connection with an adjustable wrench. Do not over-tighten. Once the joint stops leaking, run the water and check the spray again.
Bottom line
Start with the finger rub while the water runs, since Kohler lists it as the first step. If the flow is still weak, use a 50/50 vinegar solution for the time your head’s guide gives: 20 to 30 minutes for a built-in panel, or overnight for a removed head according to the New Jersey guide. Clear the remaining holes with a needle or a straightened paper clip, rinse, and reinstall with fresh thread tape. Check the joint for leaks before you call the job finished. Keep bleach and abrasive cleaners off the finish.
Sources
- Kohler Assist, “Cleaning the Real Rain Panel”, https://assist.kohler.com/en/valves-shower-bath/Cleaning-the-Real-Rain-Panel (opened 2026-10-27). Used for the finger rub, the 50/50 vinegar soak and the 20 to 30 minute soak time, the rinse step, and the metal trim warning.
- Moen Solutions, “How do I clean my Nebia by Moen showerhead?”, https://solutions.moen.com/FAQ’s/FAQ’s-Nebia_Shower_System/How_do_I_clean_my_Nebia_by_Moen_showerhead%3F (opened 2026-10-27). Used for the vinegar option, the warning against harsh chemicals, the routine cleaning method and the Nebia inlet filter.
- Moen instruction sheet ins10875, https://assets.moen.com/shared/docs/instruction-sheets/ins10875.pdf (opened 2026-10-27). Used for the paraphrased note on massage rollers and the warning against chlorine and bleach cleaners.
- New Jersey Department of Health, “Guidance for Removing and Cleaning a Shower Head”, https://nj.gov/health/cd/documents/topics/legion/ShowerHead_Cleaning_Guidance.pdf (opened 2026-10-27). Used for the supply list, the head removal steps, the overnight soak for a removed head, the needle or paper clip step, the thread tape steps and the leak check.