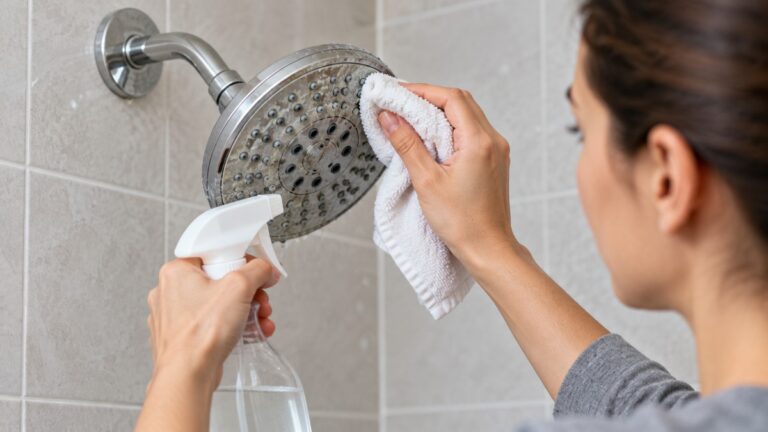
how-to-tell-if-shower-head-is-clogged
As an Amazon Associate we earn from qualifying purchases.
Knowing how to tell if shower head is clogged saves you from replacing a head that only needs cleaning. The usual signs are spray that looks uneven, streams that seem blocked in some spots, and flow that feels weaker than it used to. Moen’s care guide links uneven spray to mineral deposits, and the New Jersey Department of Health describes the same buildup in its cleaning guidance. This page covers the signs, a step-by-step check, how to clean the head, and what the sources do not say.
Quick answer
- Look at the spray face first. Uneven spray, or holes that do not spray, is the sign the sources describe most directly.
- Check for mineral build-up. Minerals can build up over time and block the nozzle holes, according to the New Jersey Department of Health.
- Remove the head and inspect it. Look at the nozzle holes and any filter screen inside the head.
- Clean it. The NJ guidance is to soak the head in distilled white vinegar, then clear stubborn holes with a needle or a straightened paper clip.
- Recheck the spray. If it is still uneven after cleaning, the sources checked for this page do not give a next step. See the section on what the sources do not say.
How we chose the signs and steps
The criteria were simple. Each source had to be a non-retail page that covers cleaning a shower head, the flow rating of showerheads, or manufacturer care for a shower fixture. The three government or agency sources and one manufacturer care guide were all opened and read on 2026-10-27. Retail product listings were not used for cleaning steps, health statements, or any claim about how a head performs.
The steps below follow the order the sources give: check the spray, remove the head, flush and clean the arm, clean the head and its screen, then reinstall and check for leaks. Where a source gives a specific instruction, such as an overnight soak, this page reports it. Where a source is silent, this page says so.
This is not a ranking of shower heads, and it does not compare products. The product section near the end covers only two listings that describe anti-clog nozzles.
Signs that point to a clog
Moen’s care guide says that if a shower head is spraying unevenly, it may be clogged with mineral deposits. That is the most direct sign in the sources checked. Uneven spray means some holes deliver water in a steady stream while others are partly or fully blocked, so the overall shower can feel patchy even when the head still runs.
The New Jersey Department of Health explains the cause. Naturally occurring minerals can build up over time and block the nozzles, which are the small holes water passes through. Regular cleaning keeps the head working properly and keeps water flow consistent. The same guidance adds that cleaning also reduces harmful waterborne bacteria on the head, including Legionella.
The EPA’s Legionella guidance makes a related point. If you see mineral build-up or a slimy film on a shower fixture, cleaning it more often is the recommended response. It also says that removing a showerhead and hose, then soaking it in a cleaning solution, can remove buildup.
Put these signs together in plain terms:
- The spray is uneven, patchy, or some holes do not spray at all.
- You can see mineral build-up or residue on the face of the head.
- Flow feels weaker than it used to, and the head has never been cleaned.
- A filter screen inside the head is dirty or blocked, if your head has one.
None of these signs proves a clog on its own. The sources do not give a rule that separates a clogged head from a head with other problems, so use the signs as a reason to check, not as a diagnosis.
Step 1: Check the spray before you take anything apart
Turn the shower on at the setting you usually use. Watch the face of the head for a few seconds. Note which holes are not spraying, whether the spray is patchy in one area, and whether the pattern looks different from the last time you ran it. Write it down or take a short video. Compare the head with the spray you expect from a clean head, and look at the face for any white or crusty residue around the holes.
If the spray is even and strong across the whole face, the head is probably not the cause of your complaint, and removing it is not necessary. The sources checked do not say how much flow loss makes a head “clogged,” so judge the spray by eye.
Step 2: Remove the head safely
The New Jersey guidance starts with the water. Turn off the water and make sure the arm is dry before you start. Then try to unscrew the head by hand, turning counterclockwise. The NJ guide says to grip the head or its connecting nut, depending on the design.
If the head will not turn by hand, wrap the shower arm with a rag or cloth and use pliers to hold it. Then use an adjustable wrench on the head. Moen’s care guide advises wrapping the jaws of the tool with masking tape or using a cloth so the finish is not scratched.
Once the head is off, unscrew it completely by hand. Keep the small parts in one place, and take a photo of how the pieces fit together. The NJ guide recommends this if you have no owner’s manual.
If you are unsure, or if the head is hard to service, the NJ guidance says it is safest to hire a qualified plumber. That is a reasonable line to hold, especially if the arm is loose, corroded, or leaking at the wall.
Step 3: Flush the arm and clean the threads
With the head off, clean the threads on the shower arm. The NJ guide says to remove any old thread sealant tape, then clean off any visible rust or mineral deposits with a cloth or toothbrush. Dry the threads before you wrap new tape.
The NJ guidance also says to use this moment to flush the pipe. Open the water briefly with the head removed, so the water runs through the arm without the flow being restricted by the head. If the flow from the bare arm looks weak as well, the sources checked for this page do not say where the restriction is. A plumber can check the supply side.
Before you reinstall the head, wrap new thread sealant tape clockwise around the threads of the arm. The NJ guide says two or three times, or as many times as the manufacturer recommends. Press the tape into the threads so it sits flat.
Step 4: Clean the head and its filter screen
Many heads have a filter screen inside. The NJ guide says it can usually be removed with a pair of needle-nose pliers. Take it out with care, and do not bend it.
Rinse the screen under running water first. For stubborn or sticky debris, the NJ guide suggests a toothbrush with an all-purpose cleaner or dish soap. Scrub the screen gently, then rinse it again until no residue comes off.
Next, soak the head itself. The NJ guidance says to fully submerge the head in a bowl of distilled white vinegar and let it soak overnight. Overnight is the interval the NJ guide gives. The sources checked do not give a shorter soak time, so the guide does not say whether a shorter soak works.
After the soak, clear the holes. The NJ guide says to use a needle or a straightened paper clip to unblock any holes that are still clogged by mineral deposits. Work from the face side, and push gently so you do not enlarge or distort the holes. Moen’s guide describes a similar step for its heads: clear the outlet and inlet holes with a thin wire, then flush the head with clean water.
Moen’s care guide also says not to use bleach on its fixtures. The guide notes that even diluted bleach can cause corrosion on stainless steel when it stays in contact for a long time. If bleach touches a fixture, rinse it thoroughly. This is one reason to stick with the vinegar method in the NJ guide.
When the head is clear, rinse it under running water to remove any vinegar and loosened debris before you put it back together.
Step 5: Reinstall, check for leaks, and recheck the spray
Reinstall the filter screen once it is clean. Screw the head back onto the arm by turning clockwise. The NJ guide says that if the arm is not sturdy, wrap it with a rag and use pliers to hold it in place while you tighten the head. Do not force it.
Turn the water on and check for leaks at the connection. If the connection leaks, the NJ guide says to re-wrap the threads with thread sealant tape and tighten again carefully with an adjustable wrench.
Run the shower again and watch the spray. If the spray is even across the face, the cleaning likely cleared the blockage. If the spray is still uneven, the sources do not give a next step for a head that stays blocked after cleaning. The EPA’s WaterSense guidance suggests checking the washer or o-ring inside the head during a replacement, which is a reasonable thing to look at if you take the head apart. The sources checked here do not cover replacement or warranty details.
Common mistakes to avoid
- Using bleach. Moen’s care guide tells owners not to use bleach on shower fixtures.
- Skipping the filter screen. If the head has one, the NJ guide includes the screen in the cleaning steps, so check it too.
- Cleaning only the outside. Mineral deposits sit inside the nozzle holes, so the soak and the clearing step matter.
- Forcing the head. Use a cloth or tape on the tool jaws, and hold the arm if it is not sturdy.
- Skipping the leak check. The NJ guide says to turn the water on and check for leaks after you reinstall the head.
Heads that describe anti-clog nozzles
Two shower head listings from the research file describe anti-clog nozzles in their own words. The listings state these features, but the sources checked do not compare how well any nozzle design resists clogs, so treat these as product descriptions only.
The first is a handheld head whose listing describes silicone anti-clog nozzles that resist mineral buildup. The listing does not state a flow rate in the fields checked. View on Amazon
The second is a handheld head whose listing describes anti-clog nozzles in its feature bullets. No flow rate appears in the fields checked for that listing. View on Amazon
If you are buying a new head, the EPA’s WaterSense program offers a useful reference point. Standard showerheads use 2.5 gallons per minute, and water-saving heads that earn the WaterSense label must use no more than 2.0 gallons per minute. The EPA says the label criteria include pressure compensation, which is meant to ensure a minimum flow across a range of household water pressures. A head with a lower rated flow is not the same as a clogged head, so check the rating before you assume a problem.
For related reading, see clearing clogged shower head nozzles, cleaning a shower head with vinegar, and why shower heads get mineral buildup.
What we could not verify: what the sources do not say
- The sources checked do not give a cleaning interval for a shower head. The NJ guide says routine cleaning keeps flow consistent, but it does not say how often.
- They do not say how much a partial clog reduces flow, so this page does not put a number on it.
- They do not give a complete list of other causes of weak shower flow, such as supply-side problems or valve restrictions.
- They do not say whether a filter built into a shower head reduces mineral clogs.
- They do not say whether a filter built into a shower head softens hard water. This page does not make that claim.
- They do not say whether vinegar is safe for every finish. Follow the manufacturer’s recommendations for the finish you have.
- They do not give replacement, warranty, or thread-size details for any specific head.
FAQ
Can a clogged shower head cause low water pressure?
The sources describe mineral buildup blocking the nozzle holes and making spray uneven. They do not give a pressure figure for a clogged head, so this page does not say how much a clog changes the feel of the shower.
How often should I clean my shower head?
The NJ guide says shower heads need routine cleaning to operate at full capacity. It does not give a fixed interval, so clean the head when you see uneven spray or visible buildup.
Is vinegar safe for every shower head finish?
The sources checked do not cover every finish. The EPA’s Legionella guidance says to follow the manufacturer’s recommendations regarding the appropriate cleaning product and method. Check the care instructions for your finish before you soak it.
Do I have to remove the shower head to clean it?
The NJ guide describes removing the head to clean the arm and the head properly. It also says that if the head is difficult to service, it is safest to hire a qualified plumber.
Does a filter in the shower head stop clogs?
The sources checked do not say whether a built-in filter reduces mineral clogs. A filter screen inside the head is a separate part that can be cleaned, and the NJ guide describes cleaning it.
Does cleaning the shower head reduce bacteria?
The NJ Department of Health says cleaning reduces the amount of harmful waterborne bacteria, including Legionella, on the shower head. The EPA’s Legionella guidance also recommends cleaning fixtures more often when mineral build-up or slime is visible. These statements come from those agencies, not from this page.
Bottom line
If the spray is uneven and you can see mineral build-up, remove the head, clean the screen, soak the head in distilled white vinegar overnight, clear the holes with a needle or paper clip, and recheck the spray after you reinstall it. If the spray stays uneven, the sources checked do not say what to do next, so treat that as the point where the cause is outside this guide.
Sources
- New Jersey Department of Health, “Guidance for Removing and Cleaning a Shower Head.” https://www.nj.gov/health/cd/documents/topics/legion/shower_head_09.23.25.pdf (opened 2026-10-27)
- U.S. Environmental Protection Agency, WaterSense, “Showerheads.” https://www.epa.gov/watersense/showerheads (opened 2026-10-27)
- U.S. Environmental Protection Agency, “Legionella in the Indoor Environment.” https://www.epa.gov/indoor-air-quality-iaq/legionella-indoor-environment (opened 2026-10-27)
- Moen Incorporated, shower fixture care guide. https://assets.moen.com/moencom/documents/literature-center/mf854.pdf (opened 2026-10-27)