Plan a Portable Camp Shower Setup
As an Amazon Associate we earn from qualifying purchases.
Outdoor shower head installation planning for camping setup starts with the water source and drainage area, not the nozzle. Decide whether the unit is a ground-standing pressure tank, a hanging gravity bag, or a powered pump; confirm how it connects; then lay out the reservoir, hose, privacy area, and runoff path before filling anything. A portable shower is not household plumbing, so its manual—not a generic shower-head tutorial—controls assembly. Use known-safe water, keep electrical parts dry, and stop if a fixed-water connection, damaged wiring, or campground rule puts the job beyond a temporary campsite setup.
Quick answer
- Match the plan to the shower type: gravity bag, pressurized reservoir, or powered pump.
- Place the water supply on stable ground or on a support rated for the full filled weight, with the hose free of kinks.
- Run a cold-water leak and stability check before heating water, entering the privacy shelter, or switching on a pump.
- Use a plumber or the campground operator for permanent supply connections, backflow questions, or damaged fixed plumbing.
Choose the system before choosing the campsite position
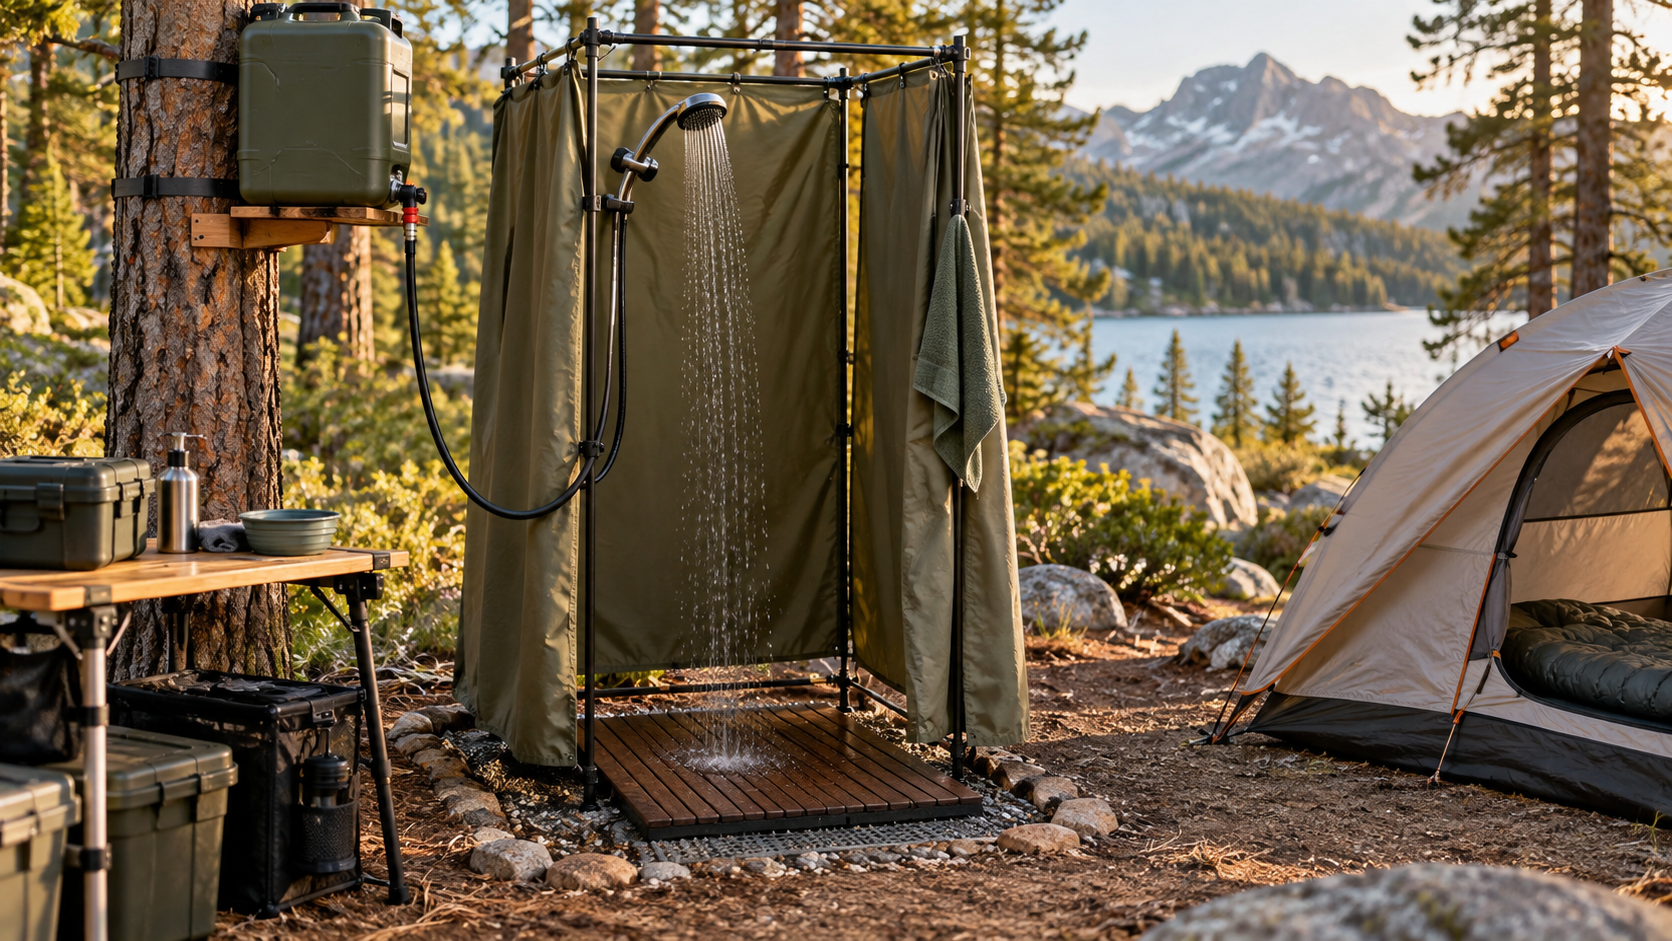
A “camp shower” can describe three different installations. A gravity bag must hang above the nozzle and needs a support that can carry the filled bag. A foot-pressurized reservoir stands on the ground and uses stored air pressure. A powered unit places a pump in or beside a water container and therefore adds a battery, cable, switch, and water-ingress concern. Treating these systems as interchangeable is how people end up with a hose that will not reach, a bag that cannot be supported, or a cable crossing a wet walking area.
Read the complete manufacturer setup instructions before packing. Record the reservoir capacity, hose length, allowable water temperature, connector arrangement, power requirements, and whether the pump may run dry. Do not assume a common garden-hose or household shower thread. Portable designs frequently use proprietary caps, quick connectors, or permanently attached hoses.
Map the installation in four zones
| Zone | What belongs there | Pre-fill check |
|---|---|---|
| Supply | Reservoir, bag, or approved water container | Stable, clean, within hose reach |
| Delivery | Hose, nozzle, pump, and cable if used | No sharp bends, pinch points, or trip loops |
| User | Privacy shelter, dry clothing, nonslip standing surface | No contact with hot surfaces or electrical connections |
| Drainage | Ground that can accept permitted gray water | Complies with campground rules and stays away from surface water |
This four-zone sketch catches conflicts early. The nozzle must reach the user without pulling the reservoir. The user should not stand on the hose. Runoff should not flow toward the clean-water container, tent entrance, electrical equipment, or neighboring campsite. Confirm the campground’s gray-water and shower rules; site-specific rules override a general layout.
Estimate whether the water and hose are enough
The NEMO Helio manufacturer page gives a useful worked example: an 11.3-liter reservoir, a 7-foot hose, and 5–7 minutes of continuous spray. Dividing capacity by time gives a planning range:
11.3 L ÷ 5 min = 2.26 L/min; 11.3 L ÷ 7 min = 1.61 L/min.
That is not a field measurement or a promise for every unit. It is a way to budget water from the manufacturer’s stated capacity and duration. For two users, the same tank would allow roughly 2.5–3.5 minutes of continuous spray each before allowing for priming or leftover water. A wet–soap–rinse routine can extend useful time because the nozzle is closed while lathering.
Check hose reach with the reservoir empty. Route it from the planned supply position to shoulder height inside the privacy area, including bends around the shelter frame. Do not stretch it taut. A taut hose transfers every movement to the tank, connector, or hanging support.
Prepare the water and equipment
Pack the shower body, nozzle, hose, all specified washers or seals, the correct charger or battery pack for powered models, a clean filling container, a ground mat, and the manufacturer’s repair items. Bring only tools named by the manual. Many portable systems are hand-assembled; using pliers on a plastic connector can turn a small leak into a cracked fitting.
The CDC warns that clear water can still contain germs. If the source is uncertain, follow CDC treatment guidance and the campground’s directions rather than assuming a shower filter or nozzle makes it safe. Water contaminated with chemicals cannot be made safe merely by boiling. Keep the clean-water opening and cap off the ground, and do not dip a dirty nozzle into the supply container.
Warm water only by a method the manufacturer permits. Never pour water hotter than the stated limit into a plastic reservoir. Mix and verify temperature before the container is sealed or pressurized. Solar warming can produce uneven temperatures, so agitate the container if the manual allows it and check water at the nozzle before use.
Ordered setup for a temporary camp shower
- Inspect dry components. Look for split hose ends, missing seals, a damaged cap, swollen battery housing, or cracked pump cable insulation. Stop if damage affects pressure containment or electricity.
- Prepare the site. Level the supply area, clear sharp objects, position the privacy shelter, and create a non-slip standing area. Verify the approved drainage direction.
- Place or support the reservoir. Put a pressure tank upright on stable ground. For a gravity bag, calculate filled load from the manual’s capacity and use only a support rated for it; do not improvise with a weak branch.
- Join the manufacturer-specified connections. Seat each washer squarely, align quick connectors, and hand-tighten threaded plastic parts. Do not add thread tape unless the manual specifically calls for it.
- Route the hose. Keep it away from stove surfaces, vehicle exhaust, sharp edges, door hinges, and walking routes. Give the user enough slack to lift the nozzle without moving the tank.
- Add a small cold-water charge for the leak test only. Close the cap as instructed, then prime with the minimum pumping or switching needed to produce flow.
- Check every joint. Watch the cap, tank outlet, hose ends, nozzle, and pump housing. Depressurize or switch off before reseating a seal.
- Run the full-use check. Fill only after the cold test passes, verify temperature at the nozzle, and confirm the tank or hanging support stays stable while the user moves.
Leak, stability, and shutdown inspection
A vehicle-mounted reservoir adds a travel inspection that a ground unit does not need. Yakima’s RoadShower manual tells owners to check and tighten its mounting brackets periodically and again after driving rough roads, and to secure the nozzle before travel. Apply those directions only to the RoadShower hardware they describe. For any other mounted tank, use its own manual and stop if rack compatibility or fastener condition cannot be verified.
A few drops left on a connection after filling are not automatically an active leak. Dry the joint, pressurize or run the pump, and watch for new water. A steady bead at a threaded joint usually means a seal is absent, pinched, dirty, or insufficiently tightened. Release pressure before touching it. Do not keep pumping against a blocked nozzle or closed valve unless the manual explicitly allows that operating condition.
For a powered shower, stop immediately if water enters the battery compartment, a connector becomes hot, insulation is cut, or the pump sounds abnormal and produces no flow. For a gravity system, stop if the support bends, the strap slips, or the bag swings into the user area. These are installation failures, not inconveniences to work around.
After use, drain the system where permitted. NEMO’s care guidance for its Helio models calls for light detergent and warm water, cycling until the hose runs suds-free, and complete drying with valves open. Follow the care instructions for the actual unit; trapped moisture and a capped wet reservoir make the next setup harder to inspect.
When the plan needs professional or site help
Ask the campground operator before connecting to a pressurized spigot, creating a semi-permanent drain, or showering where gray-water rules are unclear. Utah State University Extension identifies shower wastewater as graywater and recommends contacting the local health department when planning a graywater system. Its guidance also distinguishes more complex pressurized systems that may require an appropriately certified onsite wastewater professional. A temporary campsite shower does not create an exception to campground or local discharge rules.
Use a licensed plumber for a permanent outdoor branch, backflow prevention, freeze protection, buried piping, or a leaking fixed valve. Use the product maker for proprietary connector, battery, pump, or pressure-vessel faults. A portable installation plan should remain portable; it should not quietly become an alteration to the property’s plumbing.
How we chose
We organized the plan around failure points a camper can check before water is added: system type, filled support, hose reach, source safety, connector condition, drainage, and shutdown. The manufacturer pages supplied the concrete reservoir, hose, spray-duration, setup, and drying details. CDC guidance supplied the water-safety boundary. The calculation uses only the published reservoir capacity and duration and is labeled as an estimate.
What we could not verify
The sources do not establish one connector standard for all outdoor showers, a universal maximum water temperature, or a universal rule for gray-water disposal. They also do not show that every clear natural-water source is safe, or that a shower nozzle treats water. Those items must come from the selected product manual, campground, land manager, and local rules. The Helio calculation should not be applied to another unit unless its own capacity and operating time are known.
FAQ
Does a camping shower need to hang from a tree?
No. Gravity bags need elevation, but a foot-pressurized reservoir such as the example used here stands on the ground. Powered pumps can draw from a separate container. Use the arrangement shown in the product manual.
Should thread tape go on every camping-shower connection?
No. Many portable connections seal with a gasket, O-ring, quick connector, or molded cap. Tape can interfere with those seals. Apply it only where the manufacturer specifies a tapered threaded connection and gives tape directions.
Can I use stream water if it looks clean?
Appearance is not proof of safety. CDC guidance says uncertain backcountry water should be treated, with boiling preferred and filtration plus disinfection as the next option when boiling is unavailable. Chemical contamination requires a different water source.
Why does the nozzle pulse or lose flow?
First check water level, hose kinks, an incompletely opened nozzle, and the unit’s priming procedure. On a pressure tank, pressure may simply need to be restored within the manual’s limit. On a powered unit, stop before inspecting the intake or electrical supply.
What related shower setup guides can help?
For hose construction and flexibility, see our shower hose material comparison. For the practical differences among spray formats, read fixed, handheld, and combo shower heads.
Bottom line
Choose the water source and system type first, then accept a campsite layout only if the filled support is stable, the hose reaches without tension, safe water is available, and a cold-water leak test passes.
Sources
- NEMO Helio Portable Pressure Shower — opened October 27, 2026
- NEMO: How to clean your Helio and Helio LX — opened October 27, 2026
- CDC: Water treatment when hiking, camping, or traveling — opened October 27, 2026
- Yakima RoadShower installation instructions — opened October 27, 2026
- Utah State University Extension: Graywater Systems — opened October 27, 2026