Plan a Shower Curtain Liner Installation for Extra-Long Tub
As an Amazon Associate we earn from qualifying purchases.
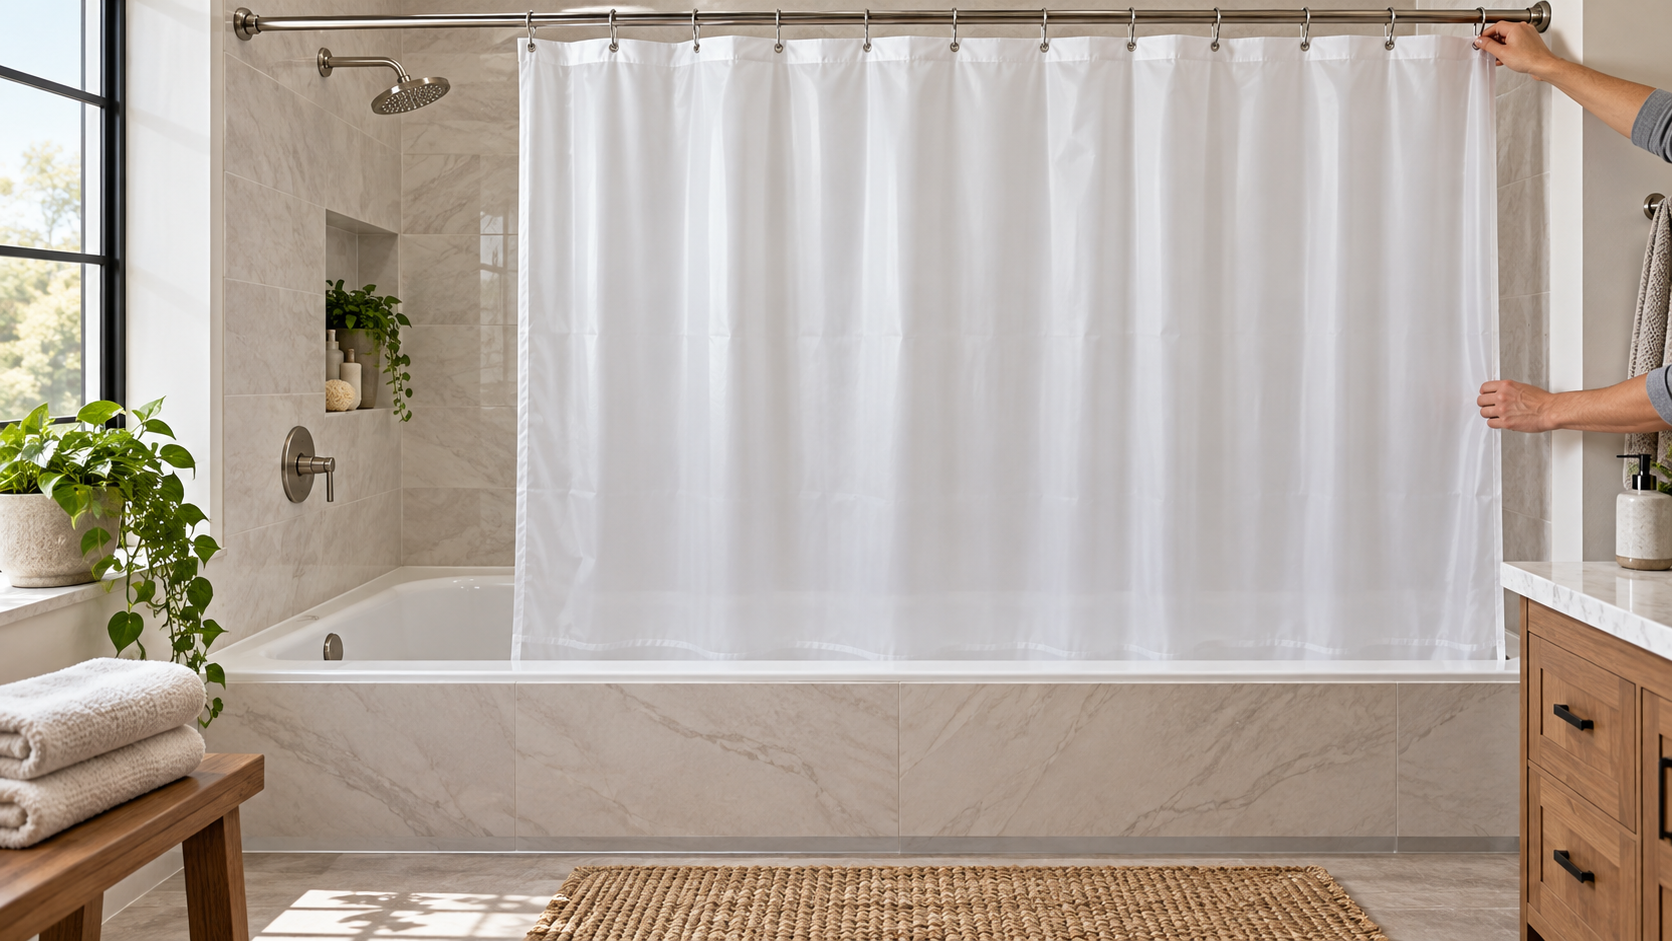
Shower curtain liner installation planning for an extra-long tub starts by measuring the wet opening and the vertical drop separately. “Extra-long” on a package may describe height, while the tub may need extra width. Choose a liner wide enough to cover the opening with overlap at both ends and long enough to hang inside the tub without resting on the bathroom floor. Mock up the bottom edge with string or painter’s tape before moving a rod, then test water containment and doorways with the liner empty and fully spread.
Quick answer
- Measure rod span, end overlap, and rod-to-interior-lip drop; do not shop by the “extra-long” label alone.
- Keep the liner inside the wet boundary, but off the bathroom floor and away from the drain.
- Center and level the rod only after confirming the liner’s real dimensions and ring drop.
- Use a professional when a fixed rod requires drilling near unknown pipes, cables, tile, or waterproofing.
Decide which dimension is actually extra
A long tub creates a width problem from end wall to end wall. A high rod or deep tub creates a height problem. Product labels do not always use “long” consistently, so record both finished liner width and finished liner height. Also count the hanging holes and compare them with the rings; a very wide liner may need more support points than an existing set provides.
Measure the horizontal wet opening along the rod line, not along the curved tub basin. Then measure vertically from the bottom of the rod to the location where the liner should end inside the tub. Include the rings or hooks because they add drop between the rod and the liner’s top edge.
Calculate the required width
minimum planned liner width = wet opening width + left overlap + right overlap + fullness allowance
Suppose the opening is 76 inches, the chosen plan uses 4 inches of overlap at each end, and 8 inches of fullness so the liner is not stretched tight. The planned width is 76 + 4 + 4 + 8 = 92 inches. Those allowances are an example, not a universal recommendation. Adjust them to the enclosure geometry and liner instructions.
If one supported liner is not wide enough, do not overlap two random liners without considering the center seam, extra rings, and water path. A gap can open when either panel moves. Prefer a single correctly sized liner when available, or use a manufacturer-designed multi-panel arrangement.
Calculate the useful drop
liner bottom position = rod height − ring drop − liner height
Measure every term from the same reference floor or tub rim. The desired bottom position is inside the tub far enough to contain spray, yet clear of the bathroom floor, drain, and standing-water zone. There is no source-backed universal overlap depth, so use a taped mockup and the actual tub profile.
| Result of dry layout | Adjustment | Reason |
|---|---|---|
| Liner is pulled flat across the opening | Use more width | No fullness remains for movement or end overlap |
| Bottom sits on bathroom floor | Raise rod or choose less drop | The liner can collect dirt and water outside the tub |
| Bottom reaches the drain | Shorten the planned drop without unapproved cutting | The liner must not obstruct drainage |
| End opens beside the spray | Add usable end overlap or revise rod position | The wet boundary is incomplete |
| Rings lean or bunch at one end | Recenter rod and distribute holes evenly | Uneven support distorts the liner |
Map the wet boundary
Run the shower briefly with the tub empty and note where spray reaches the end walls, rim, and outer edge. Turn the water off and dry the area. The liner needs to remain inside the rim along the active spray zone. Curved rods add elbow room but can shift part of the liner outward, so verify the lower edge still falls inside the tub.
The Home Depot selection guide describes the liner’s function as keeping water inside the tub or shower. It also notes that a liner and decorative curtain can share rings on one rod, while a double rod separates them. Sharing rings is possible only when the holes, widths, and ring capacity align; it does not correct an undersized liner.
Choose a rod strategy after sizing the liner
A tension rod is reversible but must fit the wall span and its own surface requirements. A fixed rod adds wall penetrations and requires correct supports. A curved or wrap-around rod can change the liner path and effective width. Do not move the rod just because a packaged liner hangs poorly; first determine whether the wrong liner dimension caused the problem.
The Zenna Home wrap-around rod manual gives a model-specific approximate height and then explicitly says to adjust when the result is unsuitable. It centers that rod over the tub rim. This is useful evidence that final placement follows the tub and curtain geometry, not a universal height copied to every bathroom.
Tools and pre-installation checks
- Tape measure, level, pencil, painter’s tape, and string
- Liner, its care instructions, and the required number of rings
- Rod manual and all supplied supports or end caps
- For fixed rods only: the specified drill bit, suitable anchors, eye protection, and a way to locate concealed services
Croydex’s rod instructions warn users to check for hidden cables and pipes before drilling, use appropriate eye protection, and choose fixings that suit the wall rather than assuming supplied plugs fit every construction. If those conditions cannot be confirmed, stop before making holes.
Mock up before mounting
- Mark the wet opening. Put small painter’s-tape markers at the desired left and right limits.
- Set a temporary rod line. Stretch string level between the intended rod positions without drilling.
- Add ring drop. Hang short tape loops or measure down from the string to the liner top.
- Mark the bottom edge. Use a second string or tape tabs to show where the liner would end.
- Check entry and drain clearance. The mock bottom must stay inside the tub but away from the drain and bathroom floor.
- Simulate closure. Mark the liner width along the rod and confirm both end overlaps remain when fullness is distributed.
This dry layout is particularly valuable on an extra-long tub because small errors repeat across a wider span. A rod that is slightly out of level can make the liner appear too short at one end and drag at the other.
Install the rod and liner in order
- Confirm the final rod line. Check level, wall compatibility, and the liner mockup one last time.
- Mount by the rod manual. Use its tension range or its specified supports and fasteners. Zenna Home warns not to overtighten the tube fasteners in its model.
- Verify stability before hanging fabric. A fixed rod must not rock; a tension rod must not slide under gentle hand pressure.
- Count and open the rings. Match them to the liner holes instead of skipping holes to stretch the liner farther.
- Hang from one end in sequence. Keep the liner’s wet side oriented as its care instructions direct.
- Distribute fullness. Close the liner and spread folds evenly while preserving overlap at both ends.
- Add the decorative curtain. Share rings or use the second rod only when the hardware supports that arrangement.
Run containment and stability checks
With the liner fully closed and inside the tub, run water at a low setting. Observe both end walls, the rim, and the bottom edge. Increase to normal use only after the liner remains inside. Check the floor outside, rod ends, and any drilled mounts. Water outside may come from insufficient overlap, a liner pushed over the rim, or spray directed at an opening; it is not automatically a plumbing leak.
Open and close the liner several times. Rings should travel without pulling the rod from its supports. The bottom should not sweep across the drain or bunch into standing water. The bath tub organizer guide helps keep rim storage away from the moving liner. For broader accessory layout, the shower caddy guide covers storage that stays outside the curtain path.
When to call a professional
Use a qualified installer when a fixed rod requires drilling and the wall may conceal plumbing, wiring, waterproofing, or unsupported hollow space. Stop if tile is cracked, the wall is soft, or an existing fixed mount is loose. A plumber is appropriate when water escapes from a pipe joint or the tub drain backs up with the liner removed; neither problem is solved by changing overlap.
How we chose
This plan uses manufacturer rod instructions for overlap, leveling, fixing, drilling precautions, and model-specific positioning. It uses the retailer’s curtain guide only for the liner’s containment role and single- versus double-rod arrangement. The sizing method separates width, fullness, ring drop, and vertical overlap so “extra-long” cannot hide the wrong dimension.
What we could not verify
The opened sources do not set a universal end overlap, fullness allowance, bottom clearance, rod height, or trimming method. They do not establish one anchor for every wall. The final dimensions must come from the tub, rod, rings, liner, and their instructions.
FAQ
Does an extra-long tub need an extra-long or extra-wide liner?
Usually the tub’s end-to-end span drives width, while rod height drives liner height. Measure both because labels may use “long” for vertical length.
Should the liner touch the bottom of the tub?
It should hang inside the wet boundary, but it should not obstruct the drain, bunch in standing water, or lie on the bathroom floor. Set the exact drop with a mockup.
Can I skip liner holes to make it reach farther?
No. Skipping support points can distort the top edge and does not create real width. Use a liner sized for the span.
Can the liner and curtain use the same rings?
They can when the holes align and the rod and rings support the arrangement. A double rod separates the layers and may improve access for drying.
Should the rod be centered over the tub rim?
That is the direction in the cited Zenna Home model, but other rods and tubs may differ. Follow the exact rod manual and verify that the liner falls inside the wet boundary.
Can I trim a liner that is too tall?
Only when its care instructions allow it. Cutting can damage a weighted hem, magnets, seams, or reinforcement. Changing rod height or choosing the right size may be preferable.
Bottom line
Choose and place the liner from measured width, end overlap, ring drop, and tub-interior clearance; if the only way to make it fit is to stretch, drag, block the drain, or drill blindly, revise the plan.
Sources
- Croydex, Space Saver Rod fixing and care instructions (opened October 27, 2026): https://www.homedepot.com/catalog/pdfImages/00/00265017-a7f8-4537-bf4f-53abde57a146.pdf
- Zenna Home, Model 33941 wrap-around shower rod assembly instructions (opened October 27, 2026): https://www.homedepot.com/catalog/pdfImages/56/563bd340-fd60-400a-8dd4-26ec88fd2b5f.pdf
- Home Depot, shower curtain selection guide (opened October 27, 2026): https://www.homedepot.com/c/ab/the-best-shower-curtain/9ba683603be9fa5395fab9028c4b564