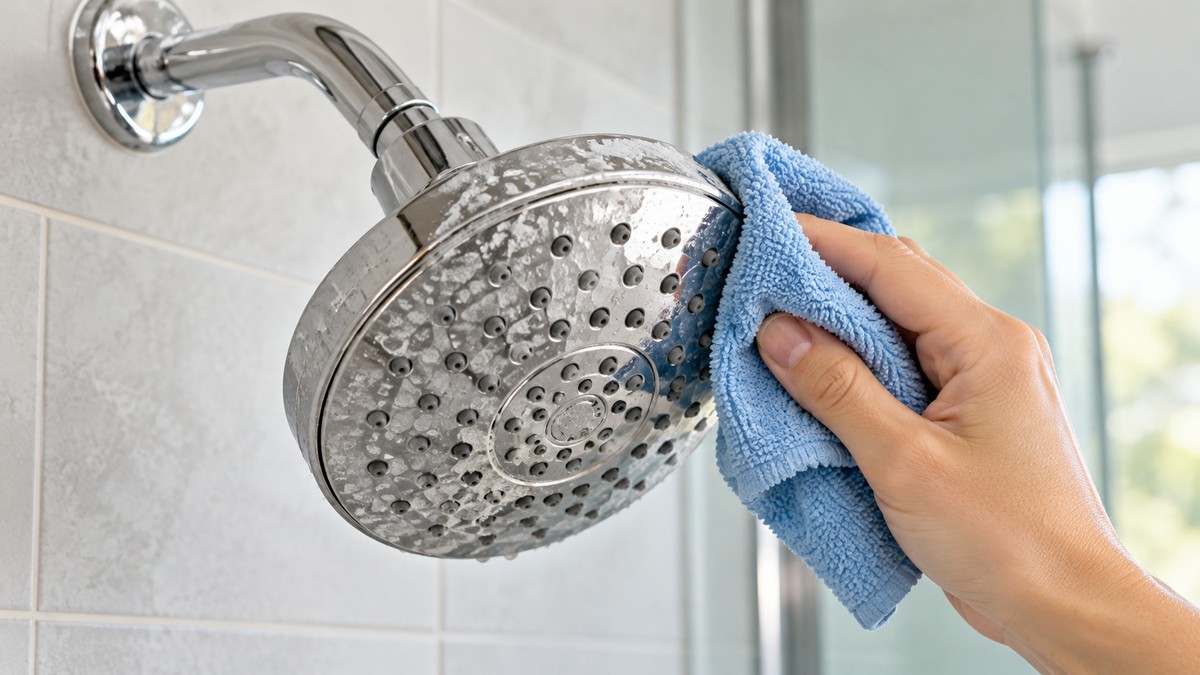
how-to-remove-water-spots-from-shower-head
As an Amazon Associate we earn from qualifying purchases.
To learn how to remove water spots from shower head fittings, you take the head off, soak it in white vinegar, and clear the clogged holes with a needle or paper clip. White spots and a patchy spray are usually mineral deposits left by hard water. The steps below come from a New Jersey Department of Health cleaning guide and a Water Pik instruction manual. Where those two sources disagree, for example on soak time, this guide says so instead of picking one.
Quick answer
- Turn off the water, then unscrew the shower head by hand. Use pliers with a cloth wrapped around the arm only if the head will not turn by hand.
- Soak the head face down in distilled white vinegar. The New Jersey guide says soak it overnight. The Water Pik manual says about 2 to 3 hours for heavier deposits.
- After soaking, use a needle or a straightened paper clip to open any holes still blocked by mineral deposits.
- Reinstall the head, check for leaks, and tighten carefully. The two guides disagree on thread tape, so check the manufacturer’s instructions for your head.
How we chose
This guide only uses steps that a published source describes in enough detail to follow. The criteria were simple. The source had to be a government, university extension, or manufacturer document. It had to describe removing, cleaning, or reinstalling a shower head, not just say that cleaning helps. The sources checked on 2026-10-27 were the New Jersey Department of Health guide on removing and cleaning a shower head, the Water Pik shower head instruction manual, the University of Maryland Extension page on hardness in household water, and the U.S. EPA WaterSense page on showerheads.
The steps here use only white vinegar and basic tools, because those are the materials the sources name. We also kept the scope narrow. This guide covers the shower head and the threaded end of the shower arm. It does not cover shower valves, supply lines, or any other plumbing work.
What the spots are and why they form
The spots on a shower head are usually leftover minerals. The University of Maryland Extension explains that hard water contains high levels of calcium and magnesium ions. It also states that these ions can leave mineral deposits (scale) on dishes, utensils, and plumbing fixtures. A shower head is a plumbing fixture, so the same deposits can collect on its face and in its nozzles.
The New Jersey guide describes the same process from the shower head side. It says that over time naturally occurring minerals can build up and block the nozzles, which are the holes through which water passes. That is why a head can keep its shape but spray unevenly. The Water Pik manual also treats mineral deposits on the spray orifices as a normal maintenance issue.
The cause matters for the fix. Mineral spots that sit on the surface often respond to a light scrub. Spots that have filled the holes usually need a soak and a needle. Some heads have rubber nozzles, and the Water Pik manual gives a different first step for those. We cover both below.
What you need
The New Jersey guide lists these supplies: an adjustable wrench, needle-nose pliers, a bowl, distilled white vinegar, thread sealant tape, a cloth, and a toothbrush. For stubborn sticky debris on the filter screen, the same guide suggests all-purpose cleaner or dish soap. Keep a second bowl or a plastic tub handy so the head can sit face down in the liquid.
Have a clean towel ready to lay the parts on. If you do not have the owner’s manual for the head, plan to take photos as you disassemble it. The guide recommends photos for that reason, and it is the simplest way to avoid mixing up small parts.
Step-by-step: remove water spots from the shower head
Step 1: Turn off the water
Before you touch the head, shut off the water supply to the shower. The New Jersey guide tells you to turn off the water before you clean the threads, and it also says that the arm should be completely dry before you wrap it with tape. Working with the water off keeps water from spraying while you loosen the head.
Step 2: Remove the shower head by hand first
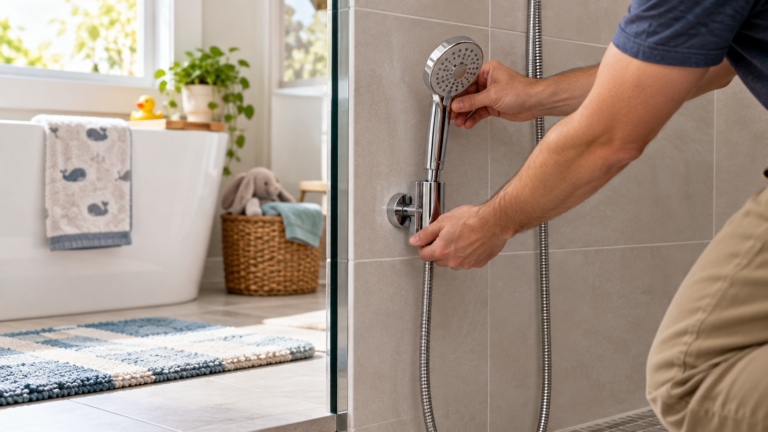
The New Jersey guide says to try removing the head by hand first. Grip the head or the connecting nut, depending on the design, and turn it counterclockwise. The guide puts this method first, before any tools.
If it does not come off by hand, the guide says to wrap the shower arm with a rag or cloth and use pliers to hold it in place. Then use an adjustable wrench on the head to loosen it. Once it breaks loose, you can unscrew it completely by hand.
If a head is stuck hard, stop before you apply more force. A stuck head is a separate problem with its own causes, and a linked guide on that topic is listed at the end of this article.
Step 3: Clean the threads on the shower arm
Look at the threaded end of the arm. The New Jersey guide says to remove any existing thread sealant tape. Then it says to clean off any visible rust or mineral deposits using a cloth or toothbrush. This is also the moment to run water through the arm with the head off, because the guide notes that the plumbing can be flushed without the flow being restricted by the head.
After cleaning, turn the water off again if you turned it on, and let the threads dry completely. Let the threads dry before you wrap or reinstall anything.
Step 4: Take the head apart if the design allows
Some heads come apart so you can reach the inner parts. The New Jersey guide says to disassemble the shower head, and it adds that if you no longer have the owner’s manual, you should take photos to help you remember how the pieces go back together. Do not force a part that does not come apart easily. Many heads are sealed, and the guide does not describe how to open a sealed head.
Shower heads often have a filter screen inside. The guide says it can be removed with needle-nose pliers. This screen can hold sediment and can be a second place where spray becomes uneven.
Step 5: Clean the filter screen
Rinse the filter screen with water first. The New Jersey guide says you can clean the filter by rinsing it with water. For sticky debris that does not come off, it suggests using a toothbrush with all-purpose cleaner or dish soap. Rinse the screen well after using any soap, so no residue is left in the holes.
Step 6: Soak the head in white vinegar
This is the main step for water spots. The New Jersey guide says to fully submerge the shower head in a bowl of distilled white vinegar and let it soak overnight. That is the longer of the two times in the sources, and it is the one to use if you have time and the head fits in the bowl.
The Water Pik manual gives a different method for heavier deposits. It says to remove the shower head and soak it face down in 1 to 2 cups of white vinegar for about 2 to 3 hours. The manual also says to use white vinegar only. The two sources do not agree on the time. The safe reading is to follow the instructions printed for your model, and if you have no printed instructions, start with the shorter time and check the nozzles before you decide to wait longer.
Face down is the position both soak instructions describe.
Do not use vinegar as a mixed solution with other cleaners. The sources name white vinegar, and the Water Pik manual warns against harsh cleaners. The warning is short and direct: do not clean or rinse any part with harsh chemicals, heavy duty cleaners, or abrasives, because this may damage parts or the finish.
Step 7: Clear the holes
After soaking, take the head out and rinse it. The New Jersey guide says to use a needle or a straightened paper clip to unblock any holes that are still clogged by mineral deposits. Work gently, one hole at a time, and do not enlarge the holes. Turn the head over so loosened debris can fall out.
If the head has rubber nozzles on its face, the Water Pik manual gives a different first step. It says to gently rub the rubber nozzles on the face of the shower head to dislodge mineral deposits. Use this rub step before soaking if the spots are light, and use the soak if the nozzles stay blocked.
Step 8: Rinse and dry the parts
Rinse the head and any filter screen with clean water. Do not leave vinegar in the head before you reinstall it. The Water Pik manual says to replace the head and run it in each mode to flush out vinegar. That step is for the spray settings on that model, so run each setting you have on your head.
Set the parts on a towel while you prepare the arm. A clean, dry set of parts is easier to reassemble and easier to check.
Step 9: Reinstall the head and check for leaks
Screw the clean head onto the arm by turning it clockwise. The New Jersey guide says to screw on the head in the clockwise direction. If the shower arm is not sturdy, the same guide says you might need to wrap the arm with a rag and use pliers to hold it in place while you tighten the head.
Turn the water on and check for leaks at the connection. The guide says to turn the water on and check for leaks. If the connection leaks, the guide says to re-wrap the threads with thread sealant tape and carefully tighten again with an adjustable wrench. Tighten in small steps, and stop when the leak stops.
Step 10: Decide on thread tape
The two sources disagree on tape. The New Jersey guide says to wrap thread seal tape in a clockwise direction two or three times around the threads of the shower arm, or as many times as the manufacturer recommends. The Water Pik manual says that pipe tape is not recommended. This is a conflict between a general guide and a specific manual. For your head, the manufacturer’s instruction is the better guide. If the manual says no tape, do not add tape. If there is no manual, the New Jersey guide gives a fallback, and you can check whether the head leaks after reassembly.
Whatever you choose, remove any old tape before you start. The guide says to remove existing thread sealant tape before you clean the threads, which is the step that makes the new seal consistent.
Check the result
After reinstalling the head, run the water and watch the spray. Look for three things: even spray across the face, no leak at the connection, and no visible deposits left in the holes. Light spots on the face can remain after a soak. The Water Pik manual’s rub step is the source-backed option for those spots.
If the spray is still uneven after the soak and the holes are clear, the cause may be somewhere else in the plumbing or in the head’s internal parts. The sources in this guide do not cover that case. Check the manufacturer’s support pages or ask a licensed plumber about the supply side.
Common mistakes to avoid
- Do not use a harsh cleaner. The Water Pik manual says not to use harsh chemicals, heavy duty cleaners, or abrasives on any part of the head.
- Do not use anything other than white vinegar in the soak. The Water Pik manual says white vinegar only.
- Do not enlarge the nozzle holes with a metal tool. Use a needle or straightened paper clip, as the New Jersey guide describes, and work gently.
- Do not over-tighten the head to stop a drip. The guide says to re-wrap the threads and tighten carefully, not to force the connection.
- Do not skip the water shutoff. Working on a live line can spray water while you loosen the head.
What we could not verify: what the sources do not say
The sources opened on 2026-10-27 do not cover every shower head. The New Jersey guide describes the general steps for removing and cleaning a head, but it does not list the finishes that vinegar can damage. The Water Pik manual covers its own products. It does not say whether the same soak times suit other brands. Because of this, the time ranges in this guide apply to the sources, not to every head on the market.
The sources also do not say how much vinegar the New Jersey method uses, only that the head should be fully submerged. They do not give a temperature for the vinegar. The University of Maryland page does not describe how to clean a head, only what hard water deposits are. None of the sources we opened give a general figure for how often a head should be cleaned, so this guide does not give one.
No source opened for this guide describes removing spots from glass, tile, or the finish of a specific brand. If your head has a special coating, check the manufacturer’s care page before using vinegar. The sources do not state that vinegar is safe on every coating, and this guide does not claim that it is.
FAQ
Can I use white vinegar to remove water spots from a shower head?
The sources name white vinegar for this job. The New Jersey guide says to submerge the head in distilled white vinegar, and the Water Pik manual says to use white vinegar only. If your head’s manual names a different cleaner or forbids vinegar, follow the manual.
How long should I soak the shower head?
The two sources disagree. The New Jersey guide says to let it soak overnight. The Water Pik manual says to soak it for about 2 to 3 hours for heavier deposits. Use the time in your model’s manual if you have one. If you do not, the Water Pik time is the shorter starting point, and you can extend the soak if the holes are still blocked.
Do I have to remove the shower head to clean the spots?
Not always. The Water Pik manual says to rub the rubber nozzles on the face of the head to dislodge light mineral deposits. Removing the head and soaking it is the method for heavier deposits. If the spots are light and the head has rubber nozzles, try the rub first.
What causes the white spots on my shower head?
White spots are usually mineral deposits. The University of Maryland Extension says that hard water contains high levels of calcium and magnesium ions, and that these can leave mineral deposits (scale) on plumbing fixtures. The New Jersey guide says naturally occurring minerals can build up and block the nozzles.
Should I put thread tape on the shower arm when I reinstall the head?
The sources do not agree. The New Jersey guide says to wrap thread seal tape two or three times clockwise around the arm threads, or as many times as the manufacturer recommends. The Water Pik manual says pipe tape is not recommended. Use the manufacturer’s instruction for your model. If you have no instruction, check for leaks after reassembly and re-wrap if needed.
Will cleaning the head fix low water pressure?
The sources in this guide do not say that cleaning changes water pressure. The EPA WaterSense page says standard showerheads use 2.5 gallons of water per minute, and that WaterSense labeled showerheads use no more than 2.0 gallons per minute. Those are flow figures for the head, not pressure. If your flow is low after cleaning, the cause may be in the supply or the valve, which these sources do not cover.
Bottom line
For light spots, rub the nozzles first. For heavier mineral buildup, remove the head, soak it face down in white vinegar for the time your manual gives, and clear each hole with a needle or straightened paper clip. Reinstall, run each spray setting, and check for leaks. Where the sources disagree on soak time or thread tape, follow the manufacturer’s instruction for your model.
Related guides
- How to clean a shower head with vinegar covers the same vinegar method in more detail for heads that are still attached.
- How to clear clogged shower head nozzles is useful if the holes stay blocked after a soak.
- Why shower heads get mineral buildup explains the water conditions behind the deposits.
- How to tell if your water is hard helps you decide whether deposits are likely to return.
- How to remove a stuck shower head covers heads that will not come off by hand.
- How to install a shower head covers reinstalling a head on a new arm.
Sources
- New Jersey Department of Health, Guidance for Removing and Cleaning a Shower Head. https://nj.gov/health/cd/documents/topics/legion/ShowerHead_Cleaning_Guidance.pdf (opened 2026-10-27)
- Water Pik, Shower Head instruction manual (care and cleaning section). https://showers.waterpik.com/pdfs/waterpik-showercare-shower-head-instruction-manual.pdf (opened 2026-10-27)
- University of Maryland Extension, Hardness in Household Water. https://extension.umd.edu/resource/hardness-household-water (opened 2026-10-27)
- U.S. EPA WaterSense, Showerheads. https://www.epa.gov/watersense/showerheads (opened 2026-10-27)